
Welcome stranger! In this tutorial, I will teach you a CHEATING way to get 3D models from most games using RenderDoc. Today I will use Monster Hunter Freedom Unite as an example.
IMPORTANTPlease be aware that the developer and maintainer in RenderDoc has stated that RenderDoc is “only intended for capturing [one’s] own programs” and the dev is “absolutely not support[ing]” copyrighted programs. Info. Therefore the technique introduced in this article must be applied only at your own risk! I will NOT be responsible for any damage your have caused with the knowledge in this article.
REMEMBER,
Use this information at your own risk — I’m not responsible for any damage that may occur.
Use this information at your own risk — I’m not responsible for any damage that may occur.
Use this information at your own risk — I’m not responsible for any damage that may occur.
OK, now that you have read the above line, we can safely start today’s tutorial!
Step 1️⃣
The first step is to download the latest release of RenderDoc. Once you have installed and granted the software necessary permissions, you can open it.
Your window should look the same or similar to the following:
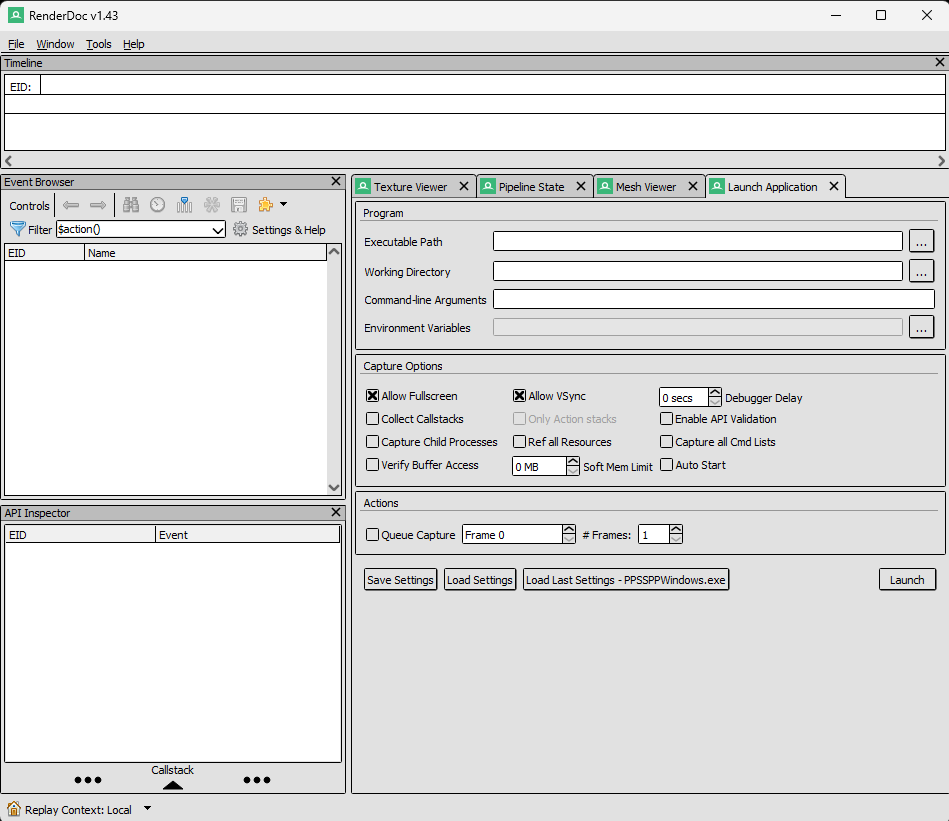
Now found the toolbar that has “Texture Viewer”, “Pipeline State”, “Mesh Viewer”, “Launch Application”. Choose “Launch Application” and from there you should see a field called “Executable Path”. You need to choose the path to your game. In this case I will choose PPSSPP because I need the emulator to play the game.
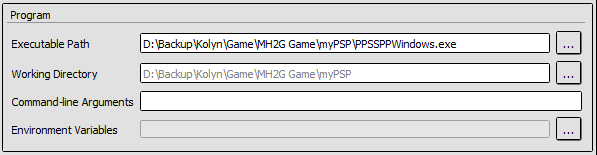
Now click “Launch” down below. Your game should open.
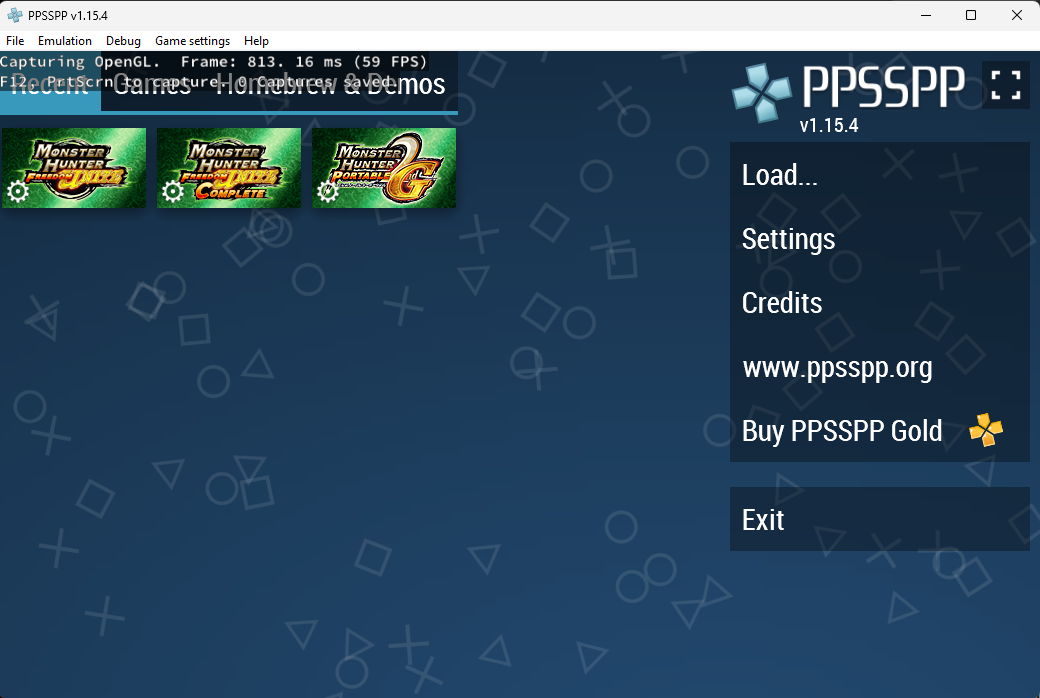
Notice in the top-left corner of the game window. It now has a new GUI that says “Capturing OpenGL. Frame: …” This is an important indicating that the RenderDoc is listening to captures now.
Step 2️⃣
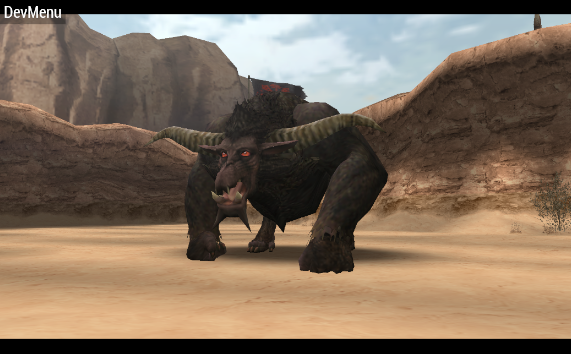
The next thing to do is to open the game and head to the game model that you want to rip. For example, I want to do Rajang’s so I will capture a frame that has Rajang on it.
IMPORTANTTo capture a frame, press “F12”.
If you go back to RenderDoc, you should see a new tab with your game’s name on it.
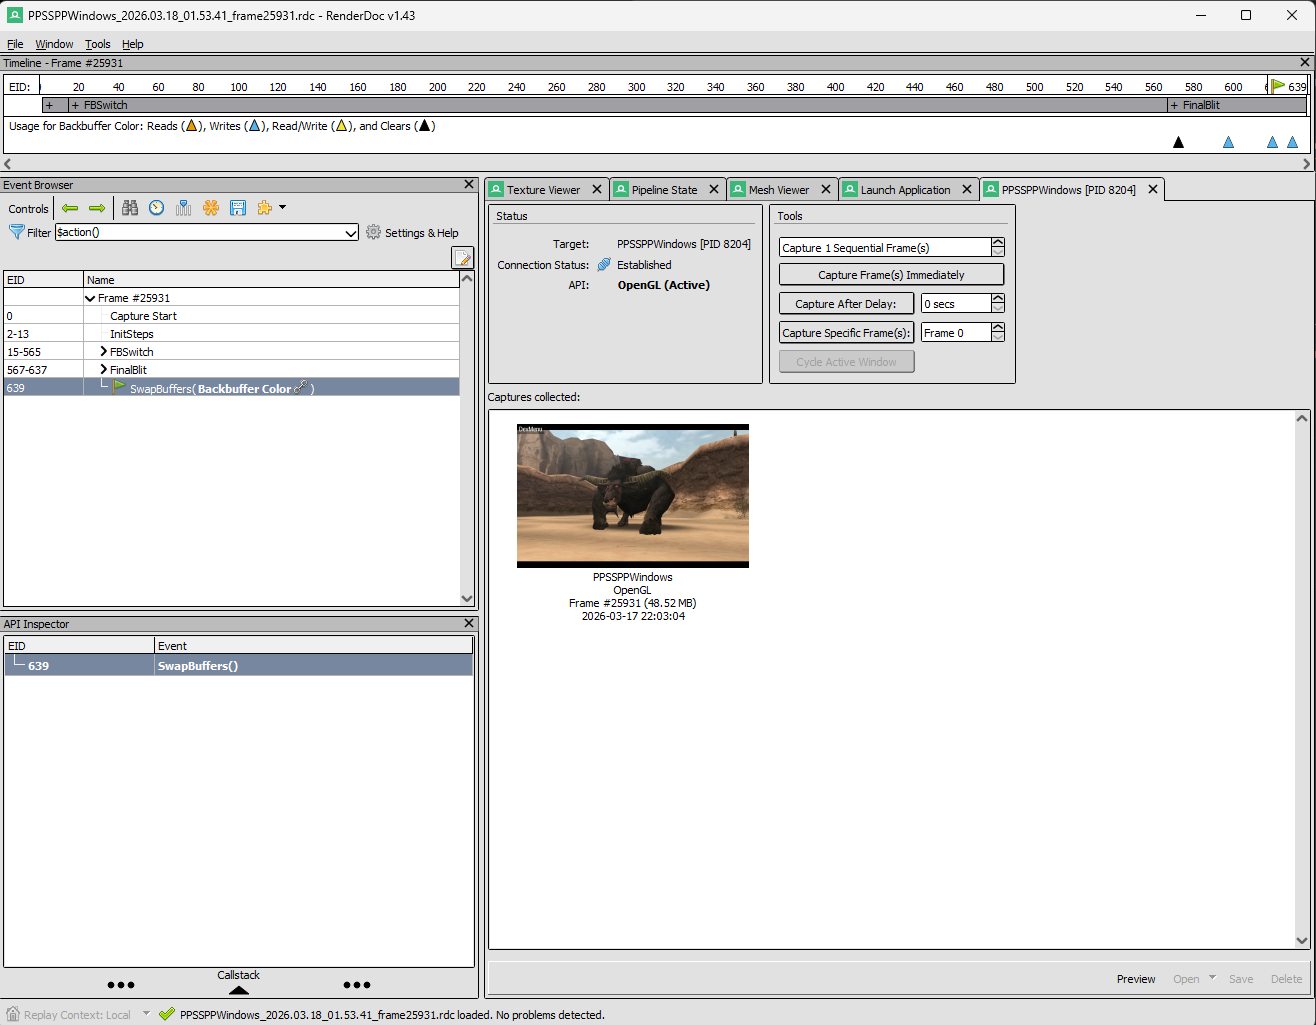
Now double-click the capture and it will be loaded.
From the left-side panel, or the Event Browser. Under “Frame #xxxxx”, find a dropdown list called “FBSwitch” and open it.
You should see many things appearing.
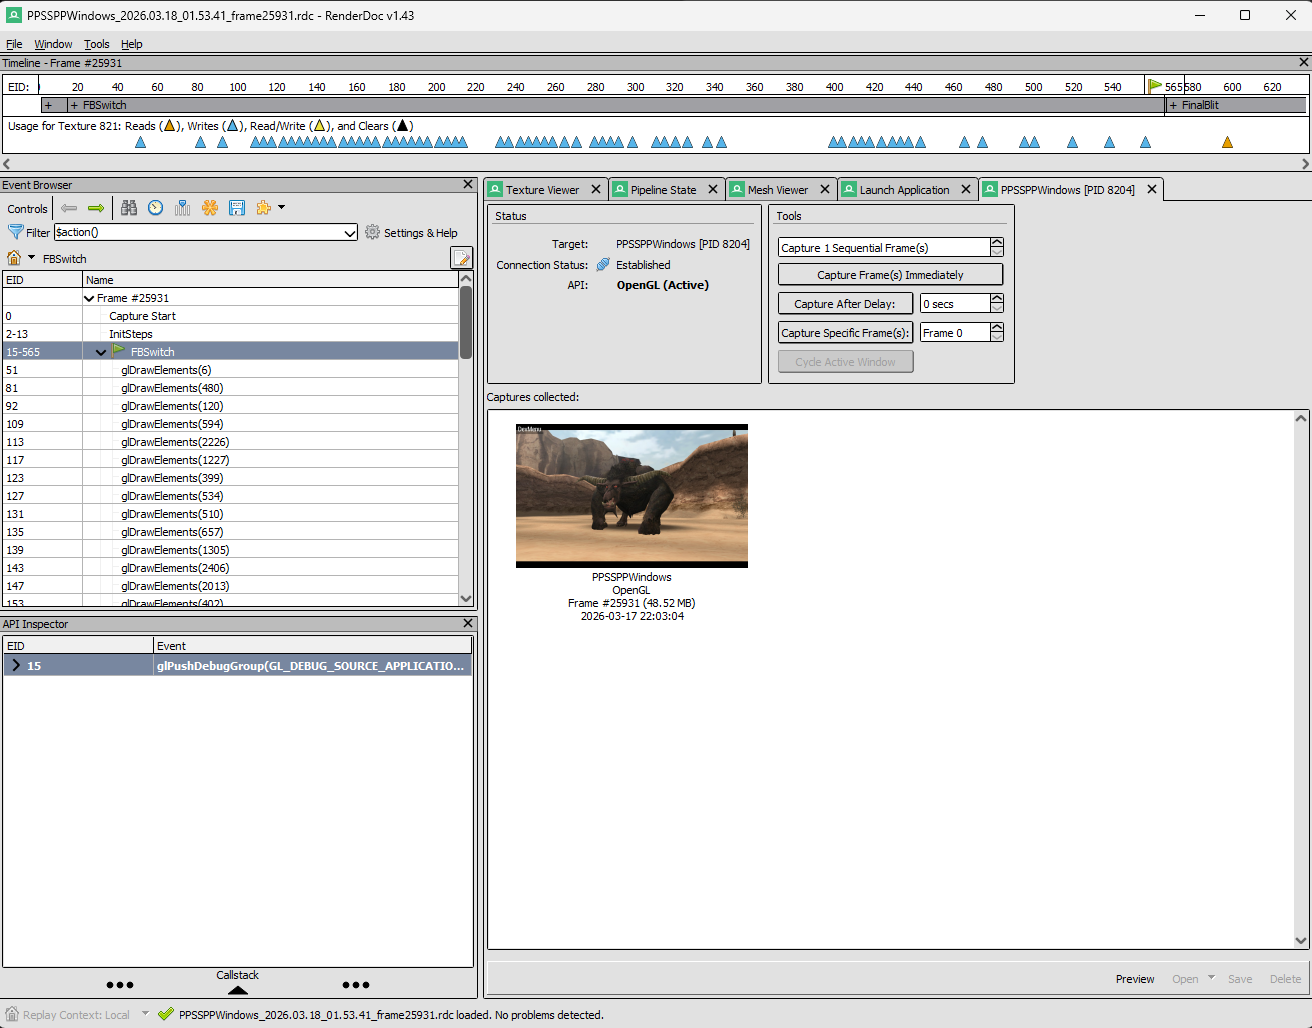
Now go to “Texture Viewer”. You will find it renders your frame upside-down.

Now I want you to click any entry under “FBSwitch”. You should see the objects in the scene of your game are rendered one by one! Find the first one that starts rendering your desired model. In my case, it appears to be this one.
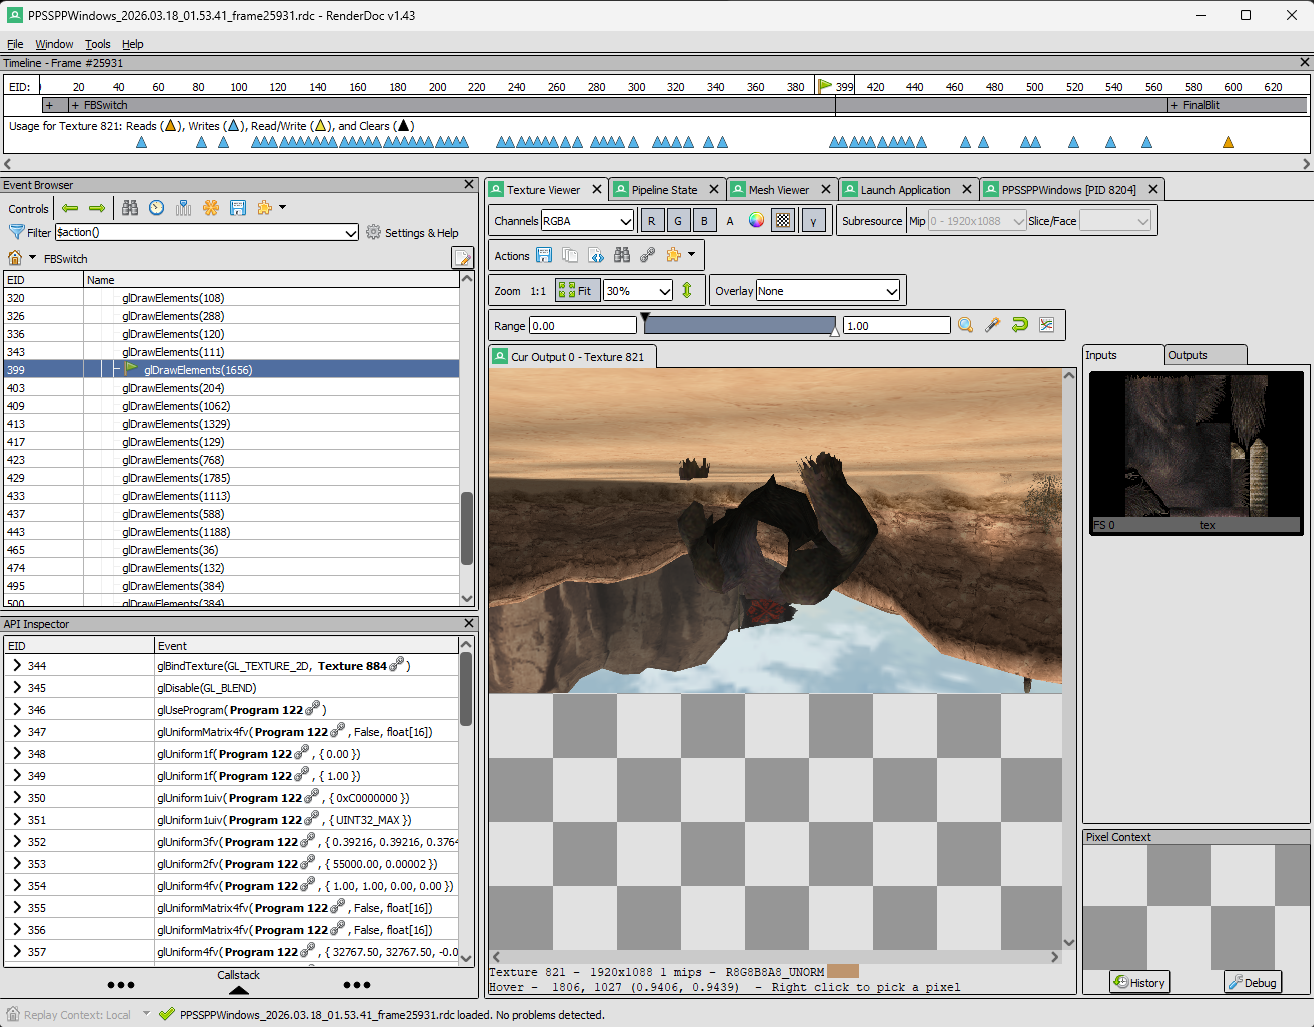
The next following elements should be also rendering this model, at least in most cases. You can verify whether an element belongs to your model by checking the Texture Input on the right side of the software.
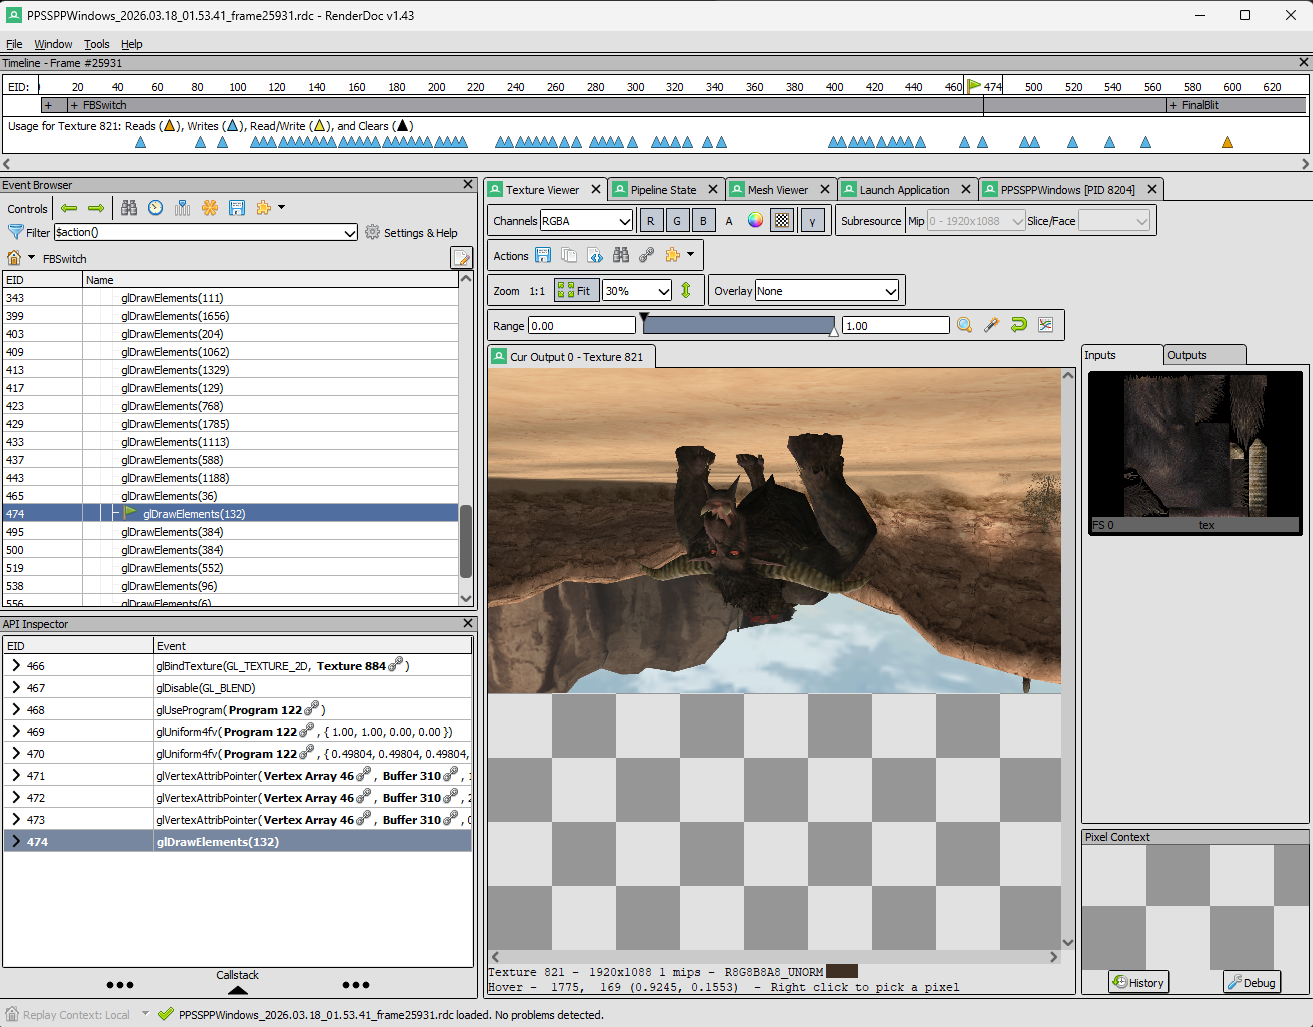
For example, my model in this case covers from glDrawElements(1656) to glDrawElements(132).
TIPIt’s extremely important to capture a good frame. The final outcome is totally depending on the current state of the model. Make sure the model is doing a general animation while you are capturing the frame. In that way, you will make your life much easier when you are rigging.
Once you have identified all elements that belong to your model. You want to export them. The way this is done in RenderDoc is by exporting to a table that represents 3D structure as a csv (Comma-Separated Values) file.
Do this for all elements. Yes, I’m afraid that you will have to repeat this procedure multiple times…
-
Select the element.
-
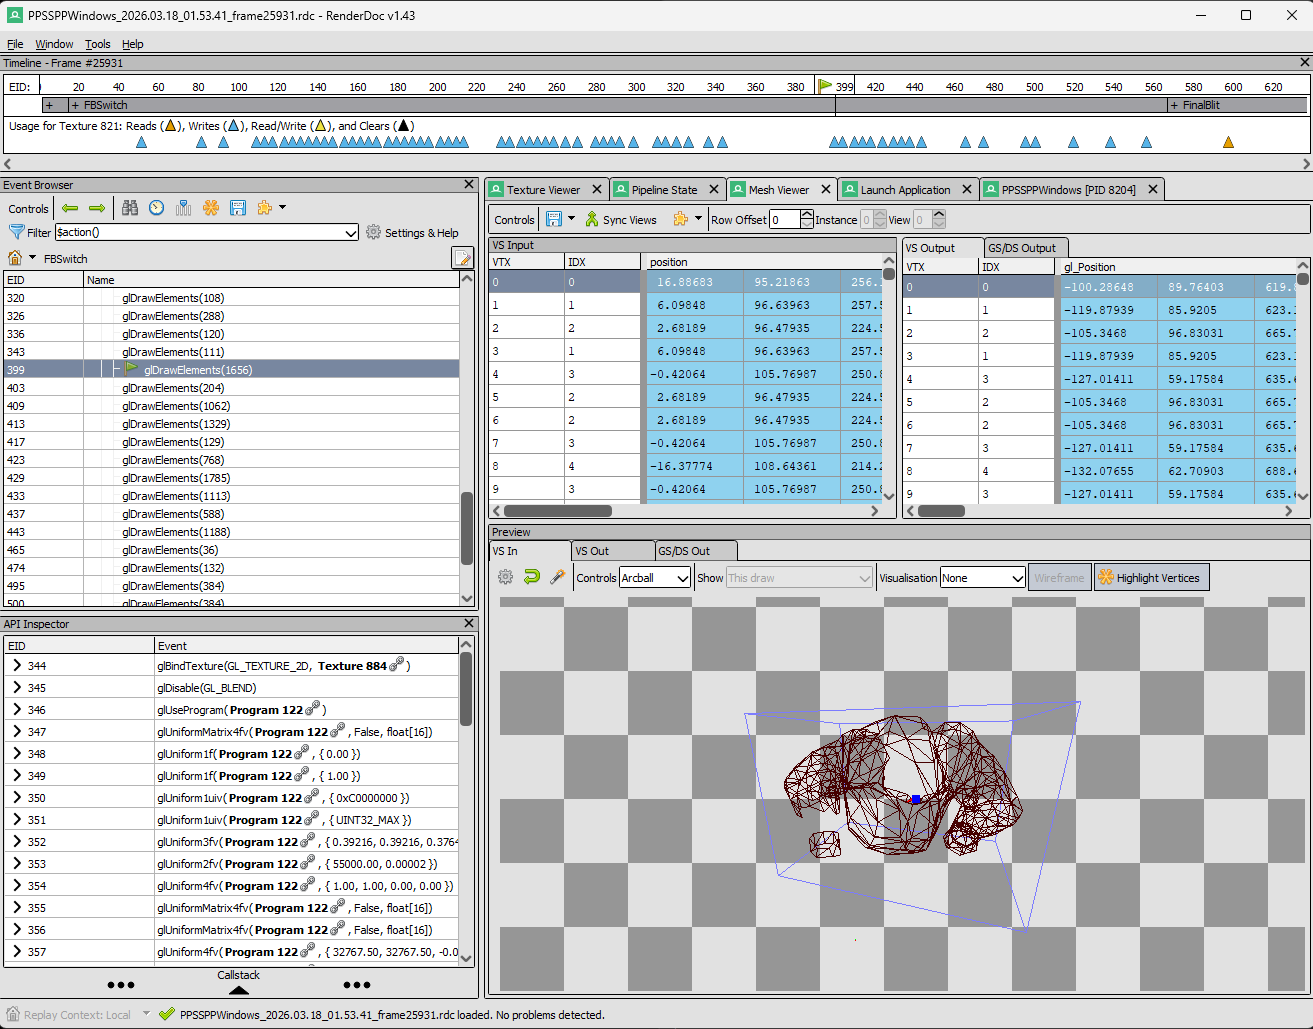
Go to “Mesh Viewer”. Notice the model is actually rendered in the Preview panel. I strongly encourage you to explore it by yourself (super fun and useful!)
-
In “VS Input” (the left side table), hover to the first line of this table (its header say “position”, “texcoord”, “normal”). Remember not the header itself but the first line! Next do a right mouse click and you should see “Export to CSV”. Do that and save the file to a location that you remember. By the way, you should probably want to name the files to something like “1”, “2”, “3”…
-
This is important! Export the texture for this element. Go to Texture Viewer -> Actions -> Save Texture to somewhere you remember. Many elements might share the same texture and you don’t need any duplication. (If you are using PPSSPP, there is another possible way to obtain textures via Developer Tools but I won’t discuss that here)
-
Repeat the above steps for all wanted elements.
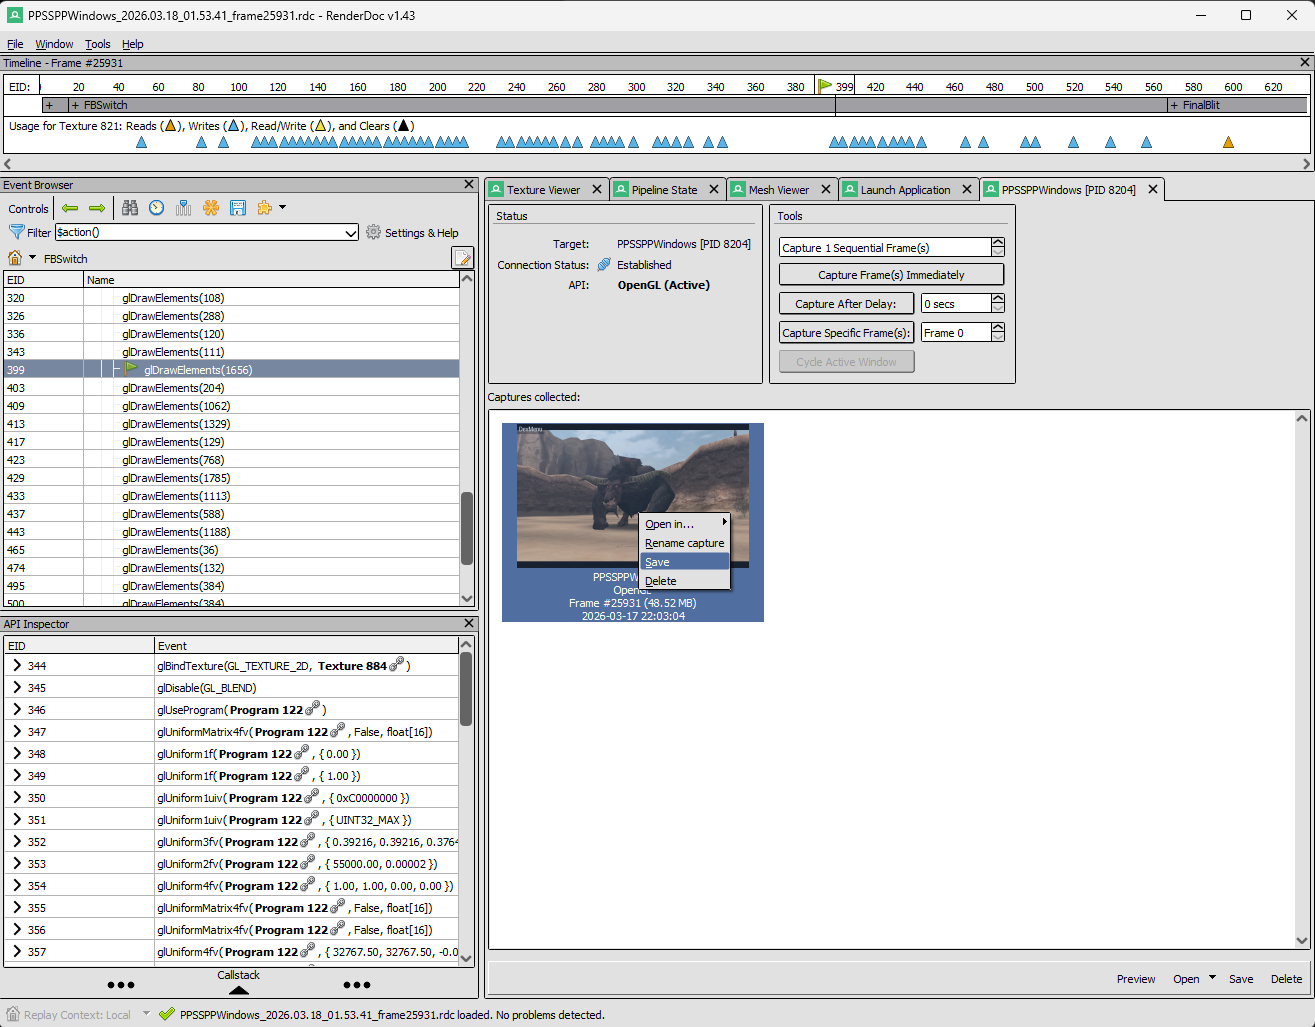
IMPORTANTAfter you are done with exporting, I suggest you save your captured frame just in case something go wrong. This is super easy and just find the Save option shown in the below image and save the capture to somewhere you remember.
Step 3️⃣
Next we want to transform our csv tables that contain information about the meshes to wavefront file so that we can import to softwares like Blender for further processing.
To do this, we need a simple Python script. Copy the following script and name the script to something like “csv2obj_batch.py”.
import csvimport mathimport os.pathfrom pathlib import Path
folder_path = "D:\\MonsterHunter2G\\monster\\rajang_normal\\csv"inverse_normal = Falsesave_path = os.path.join(folder_path, "objs")os.makedirs(save_path, exist_ok=True)folder = Path(folder_path)
for csv_file in folder.glob("*.csv"):
verts = [] uvs = [] normals = []
with open(csv_file, newline='') as f: print(f"Processing {csv_file}") reader = csv.DictReader(f, skipinitialspace=True)
for row in reader: has_normal = "normal.x" in row or "normal.y" in row or "normal.z" in row
x = float(row["position.x"]) y = float(row["position.y"]) z = float(row["position.z"])
u = float(row["texcoord.x"]) v = float(row["texcoord.y"])
if has_normal: nx = float(row["normal.x"]) ny = float(row["normal.y"]) nz = float(row["normal.z"])
length = math.sqrt(nx*nx + ny*ny + nz*nz) if length > 0: nx/=length ny/=length nz/=length
verts.append((x,y,z)) uvs.append((u,1-v))
if has_normal: normals.append((nx,ny,nz))
obj_path = os.path.join(save_path, csv_file.stem + ".obj")
with open(obj_path,"w") as f:
for v in verts: f.write(f"v {v[0]} {v[1]} {v[2]}\n")
for uv in uvs: f.write(f"vt {uv[0]} {uv[1]}\n")
for n in normals: f.write(f"vn {n[0]} {n[1]} {n[2]}\n")
for i in range(0,len(verts)-2,3): a=i+1 b=i+2 c=i+3
if inverse_normal: f.write(f"f {a}/{a}/{a} {c}/{c}/{c} {b}/{b}/{b}\n") else: f.write(f"f {a}/{a}/{a} {b}/{b}/{b} {c}/{c}/{c}\n")
print(f"OBJ written: {obj_path}")This script is basically reading the csv file and converting the table to a valid obj (wavefront). It takes position, texcoord, and normal of each vertex.
IMPORTANTBy the way, this code assumes that all faces are triangular. If you happen to encounter a different system you will have to modify the code to fit to your case.
There are some configurations you need to do before you run this script. First, change the folder_path variable to the folder that has your saved csv files. Your folder structure should look like:
csv|_ 1.csv|_ 2.csv|_ 3.csv|_ ...The next variable inverse_normal should be False most of the time, but if you have a mesh that looks “weird” after you import it to Blender, you should set it to True and rerun the script for only that mesh and import to Blender again.
That’s it, you shouldn’t need to change the rest of the code unless you don’t want to include normal or your game model has faces other than 3.
In case you have never used Python before… Find and open the terminal app from your PC. Next cd to the directory that has your Python script. If you don’t know how to use a terminal please search up a tutorial. I know it’ll be super simple for you.👌 Once you are in there, type the below command and hit Enter.
python csv2obj_batch.pyIf it says something like you don’t have Python, you will need to install it first. Again, search the tutorial - there are tons of them that teach you how to do it.
Once you successfully run the script, it should process all meshes under the folder and say something like:
OBJ written: D:\MonsterHunter2G\monster\rajang_normal\csv\objs\0.obj...You can find a new folder called “objs” being generated and there are a bunch of obj files in it.

Step 4️⃣
In this step we will import the obj files in Blender. You can use other 3D computer-graphics softwares as well.
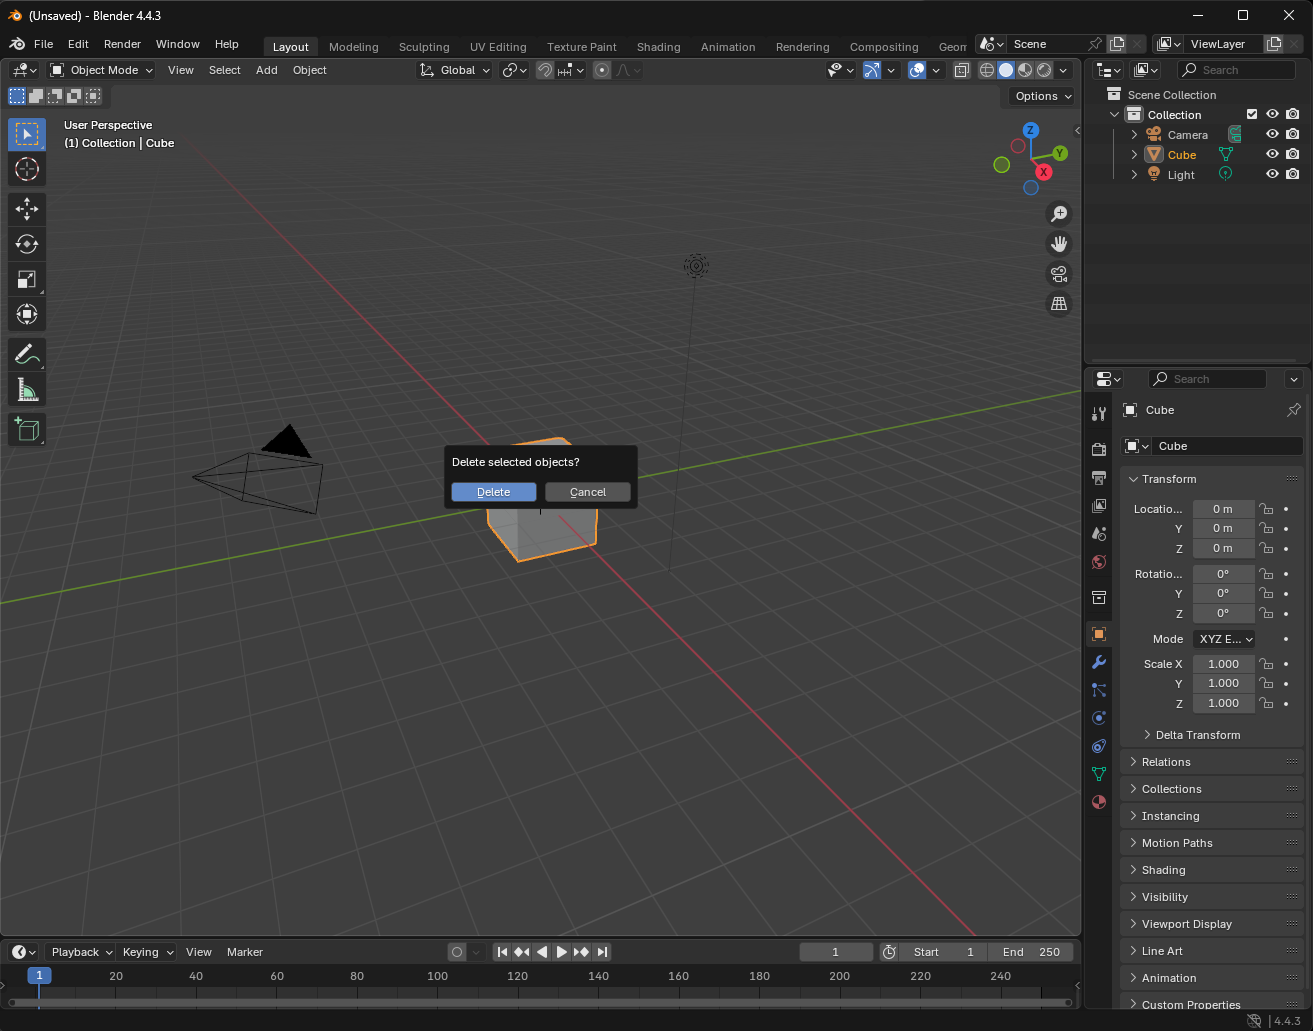
Open Blender, click the cube and press ‘x’ key. Delete the cube (Blender tradition).
Import the obj files. Go File -> Import -> Wavefront (.obj) and select it.
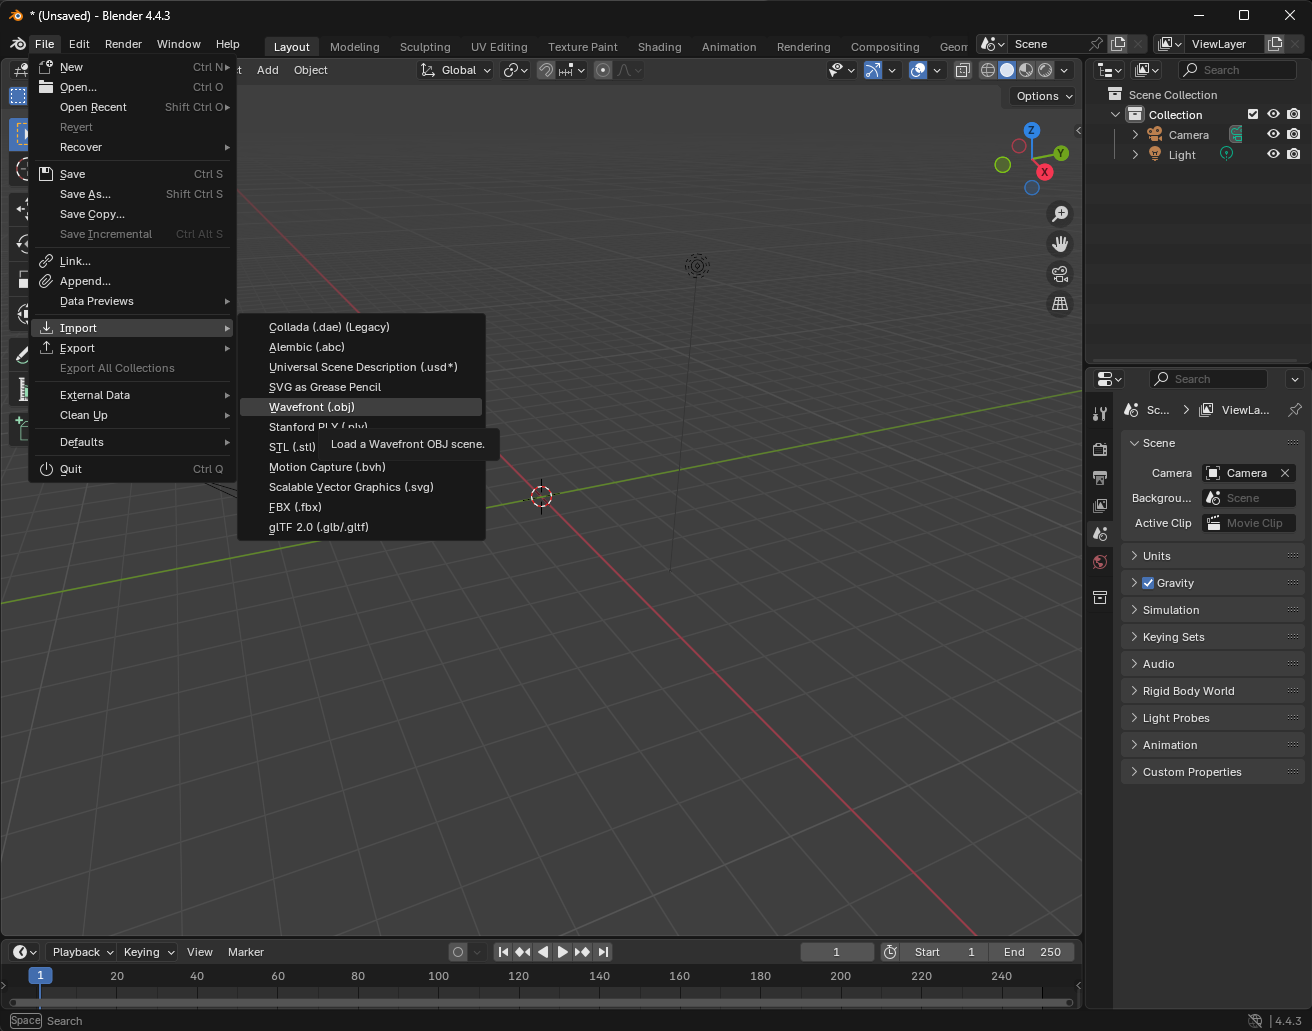
Locate your objs and select them. Then click Import Wavefront OBJ.

You should see your model successfully imported:
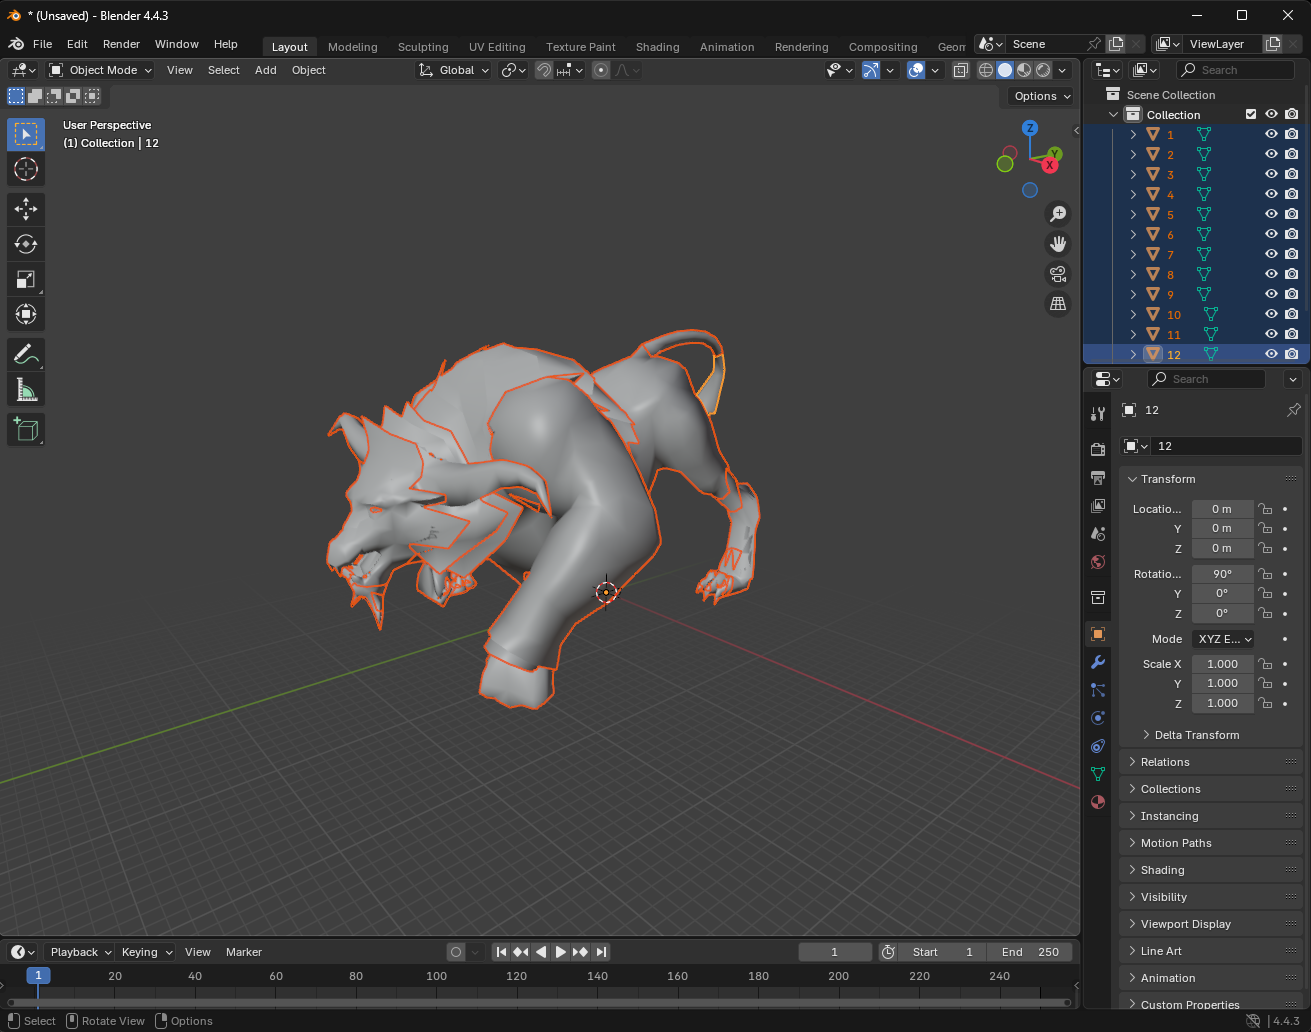
TIPSometimes the model is very large and it cannot be displayed fully in Blender. This is due to the View Clip being too small. To fix that, press key ‘n’, go to “View”, and change Clip End from 1000m to 10000m. Press ‘n’ again to close the panel.
The next thing to do is to assign textures to the meshes. However, before we proceed further, I want to make sure your have the optimal folder structure so that things don’t get messed up when you have many models.
Generally, you want a folder structure like below, which will help with scaling a lot.
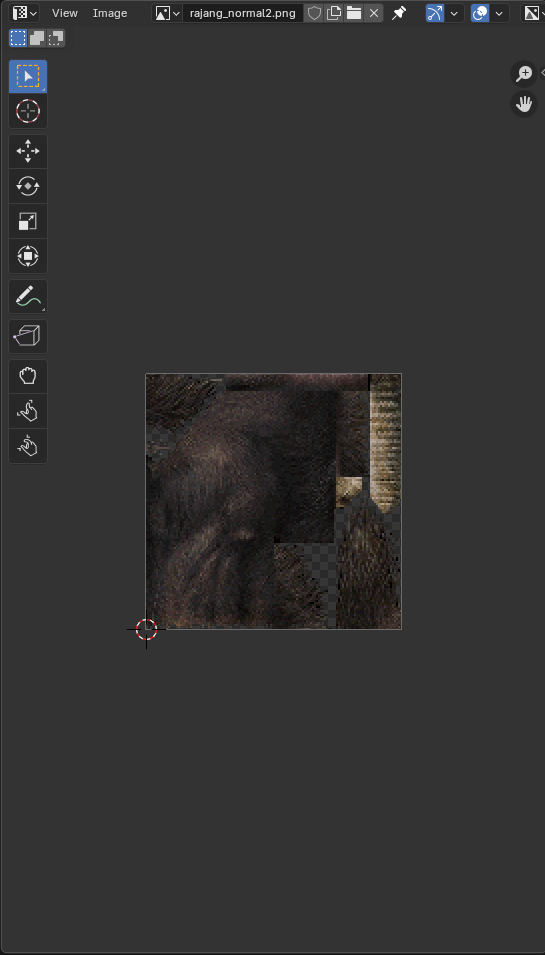
your_game|_ category |_ model_name |_ csv | |_ objs | | |_ xxx.obj | |_ xxx.csv |_ model | |_ model_name.blender | |_ model_exported.obj | |_ model_exported.mtl |_ texture | |_texture.png |_ capture.rdcNow let’s resume. Go back to Blender and from the top toolbar choose “UV Editing”.
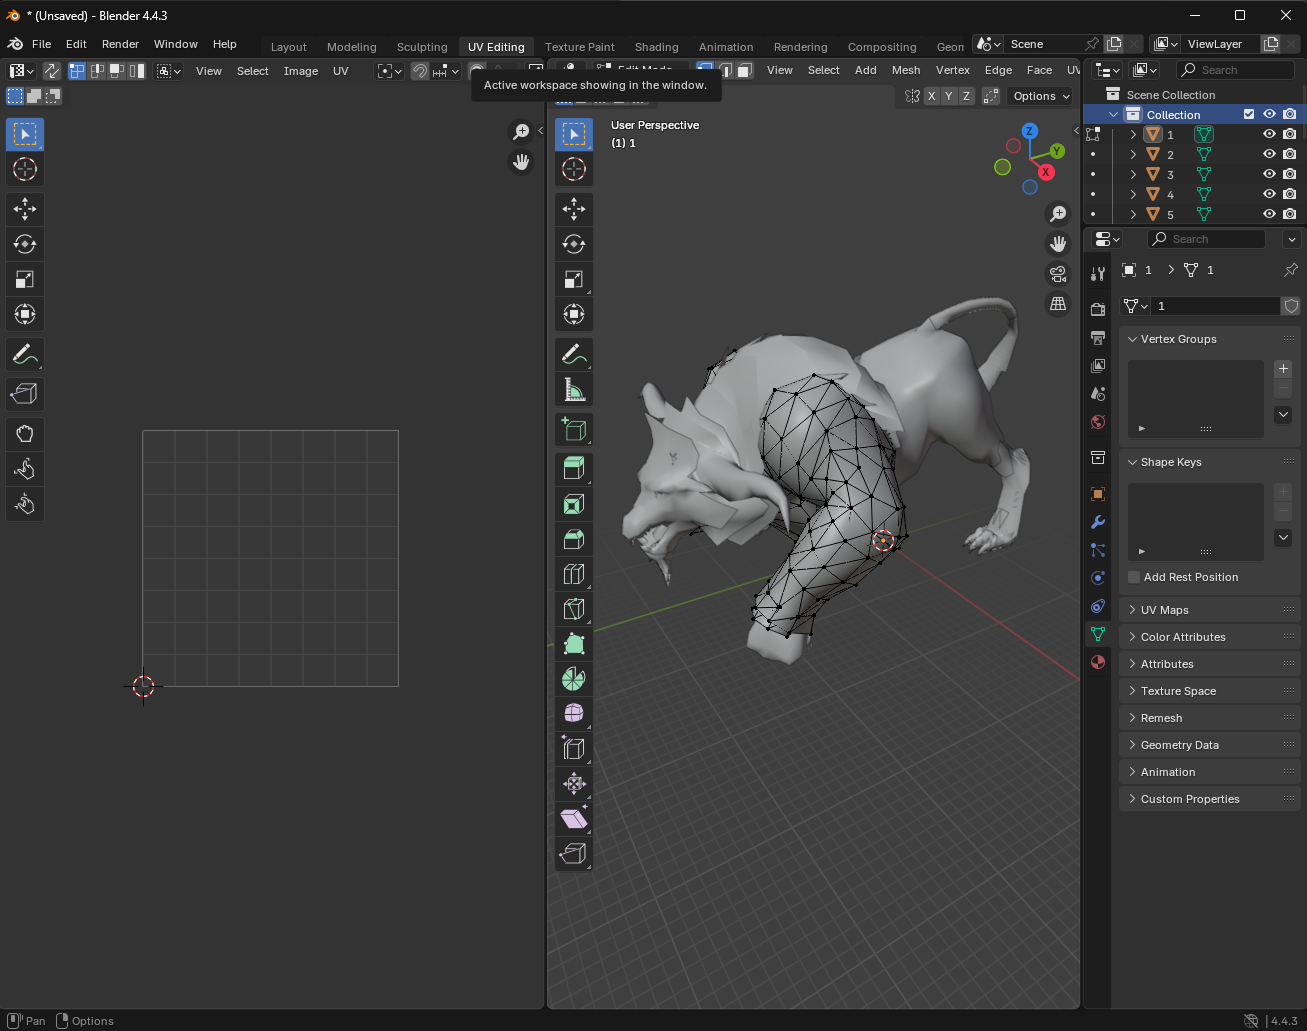
Drag all of your textures one by one into the grid in the center. Do not choose all and import; that won’t work.
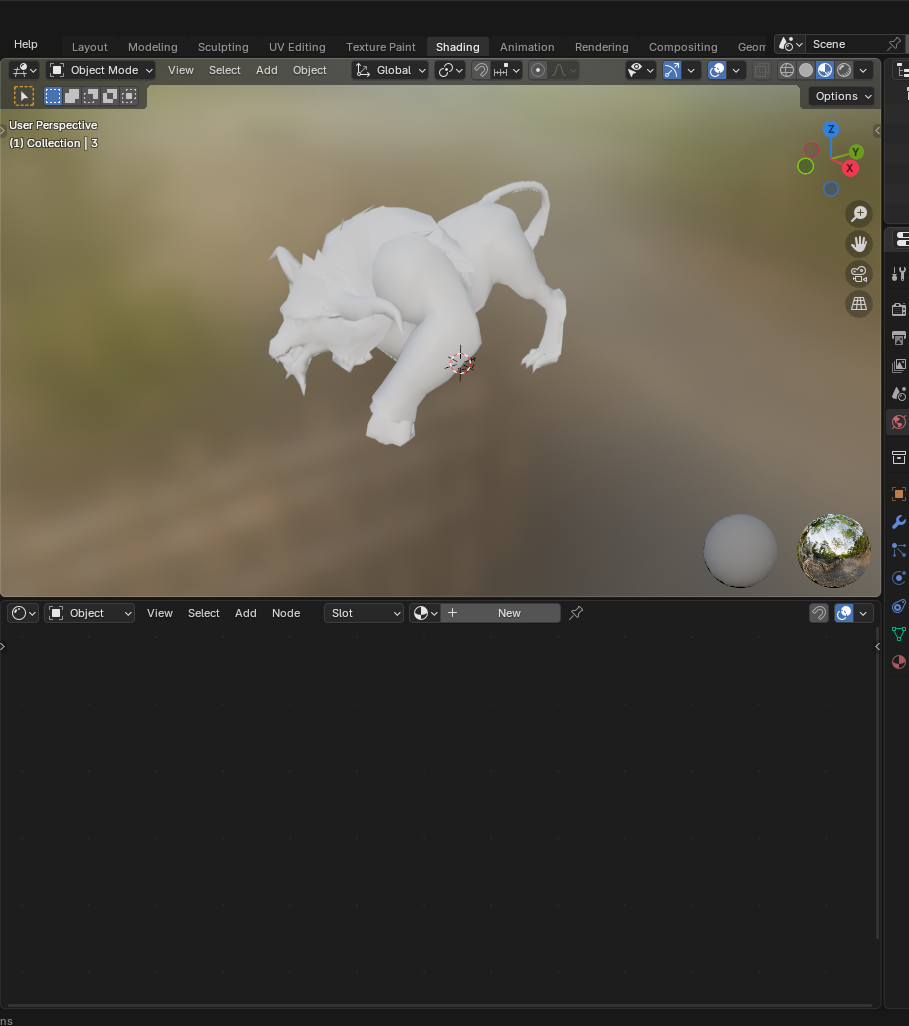
Next choose “Shading” from the top toolbar.
From the Scene Collection, choose a mesh.
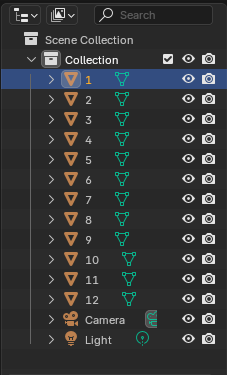
You will have to repeat the next procedures for all meshes.
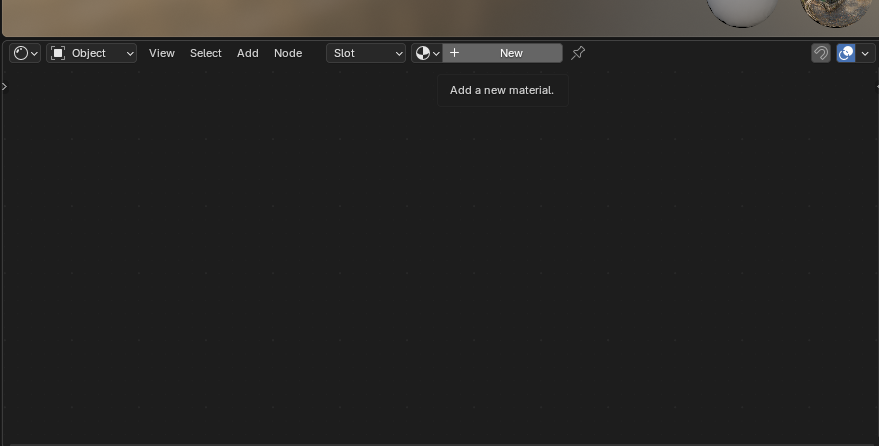
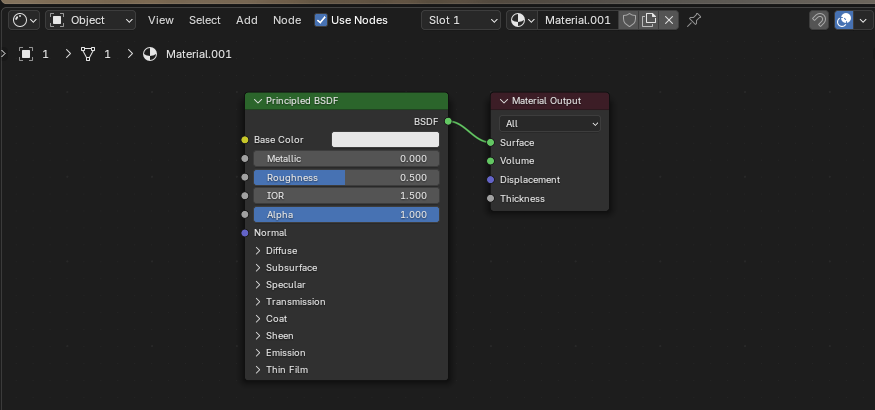
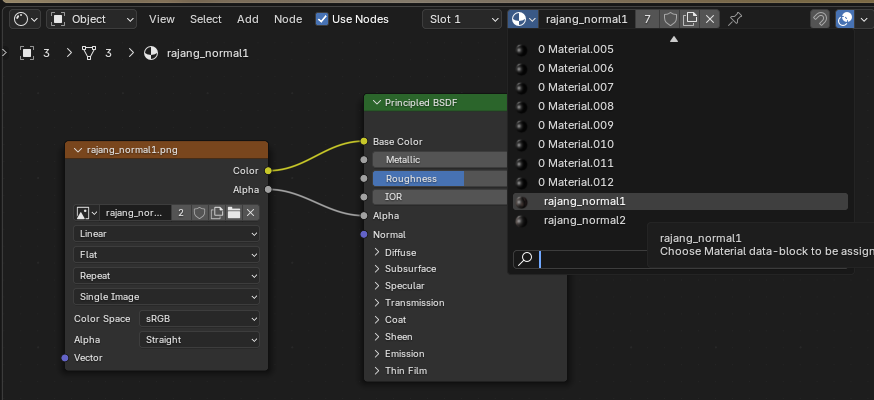
- Add a new material, the easiest way to do this is via the Node Manager, which is down below. Click ”+ New”. A “Principled BSDF” node and a “Material Output” node should be created.
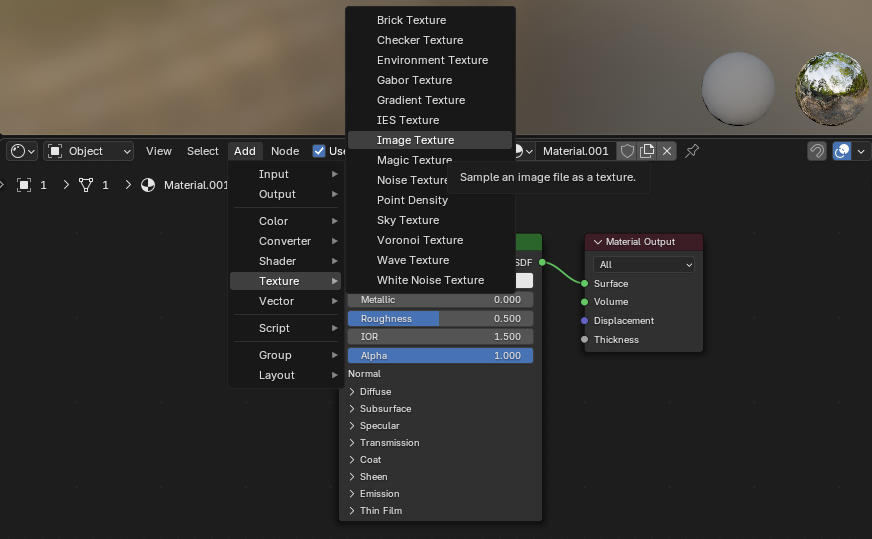
Next, add a Image Texture node. Connect the Color end point in Image Texture to the Base Color endpoint of Principled BSDF node.
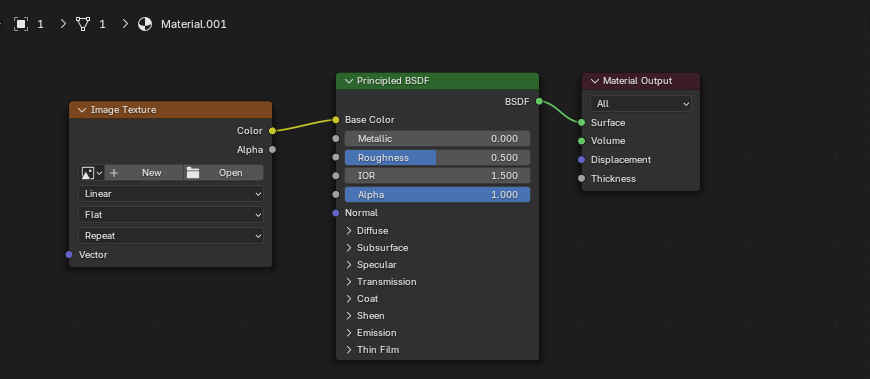
Assign an image as texture.

HOORAYWe applied the texture! 🥳
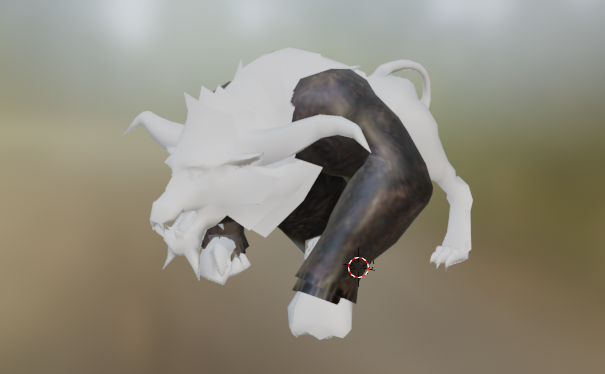
TIPHere is another tip, when you assign texture, you don’t want to make one material per mesh. Instead, you should assign an existing material to the mesh you have. Demonstration below.
From the button where you add New. You are now presented with a list of materials. You want to assign the mesh with an existing material you have. For example, in my case, there are only two materials required for all meshes. (I have renamed my materials here so that I know which ones I’m using)
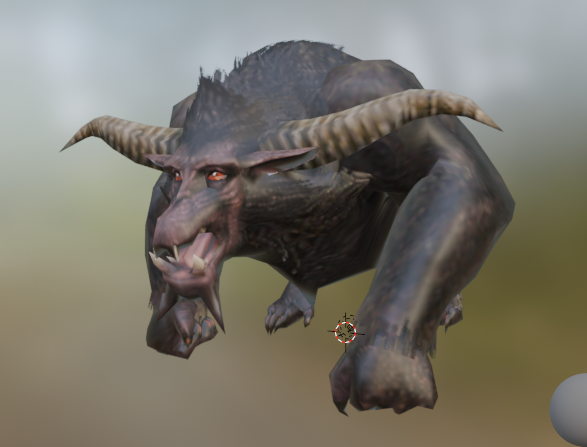
Here is my finished model. 🐒
The last thing we want to do is to save the model, along with texture. To do this, go File -> Export -> Wavefront (.obj). Save under the model folder, as previously mentioned.
If you like, also save the blender project so that if something go wrong you don’t have to build everything again. Go File -> Save As… Also save under the model folder.
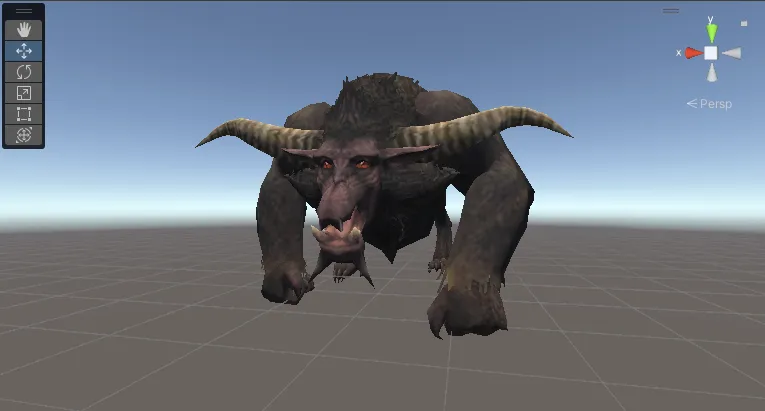
Here is the result in Unity.
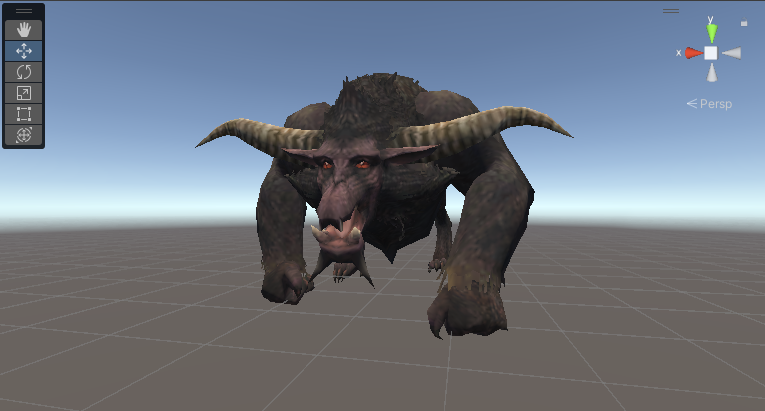
What do you think comparing to the one in the game?
Well, that’s basically it. Hope my tut is helpful for you.
💗 If you liked this blog, consider following me on GitHub.
🍯 Happy Coding 🍯