Please read this tutorial first.
Game version used in this tutorial: v2.9.1
Windows x64
This tutorial intends to teach you how to modify game character’s Spritesheet so that you can edit beyond the boundary of the source Sprite.

IMPORTANTModding comes with unknown risks, including potential game instability, corrupted save files, compatibility issues, and even security vulnerabilities. Always back up your game files and proceed with caution. Proceed at your own risk – I can’t take responsibility if things go sideways.
IMPORTANTThis is a complex tutorial. Please read and follow each step carefully. Send me an issue ticket if you encountered problems that you don’t understand.
Step 1️⃣
Firstly, download Unity 2021.3.33f1. You won’t need any Unity modules. I also strongly suggest you to learn the basics of Unity first before proceed any further.
Step 2️⃣
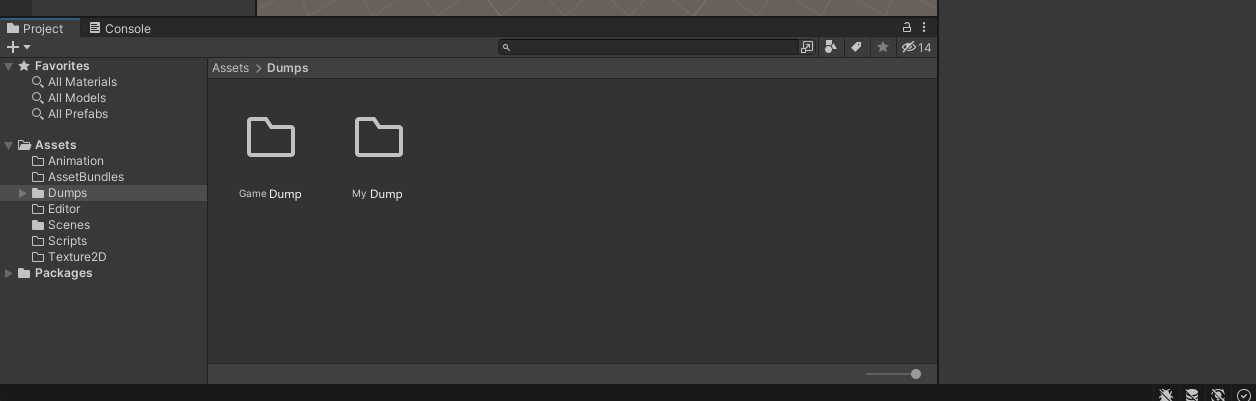
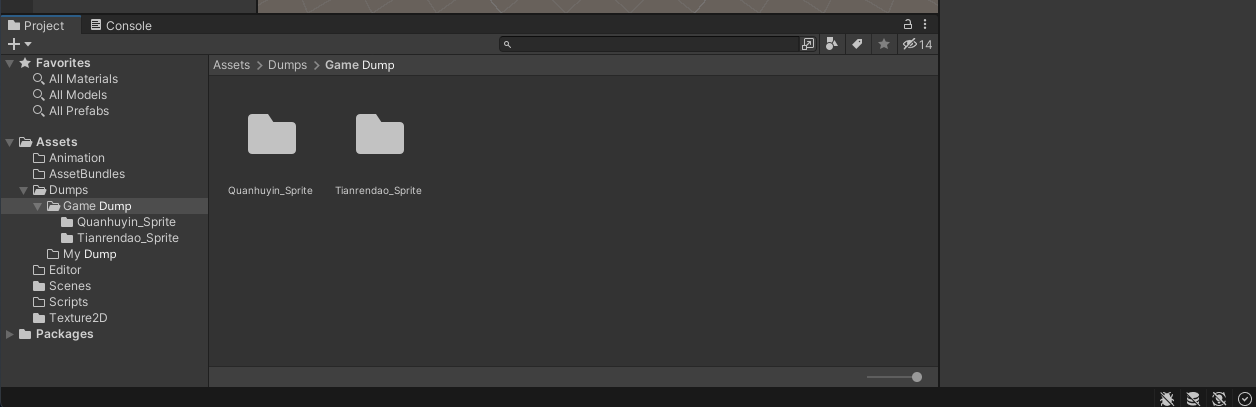
Create a new Unity Project. Choose Unity 3D as template. After you created the project, create the following folders in Assets.
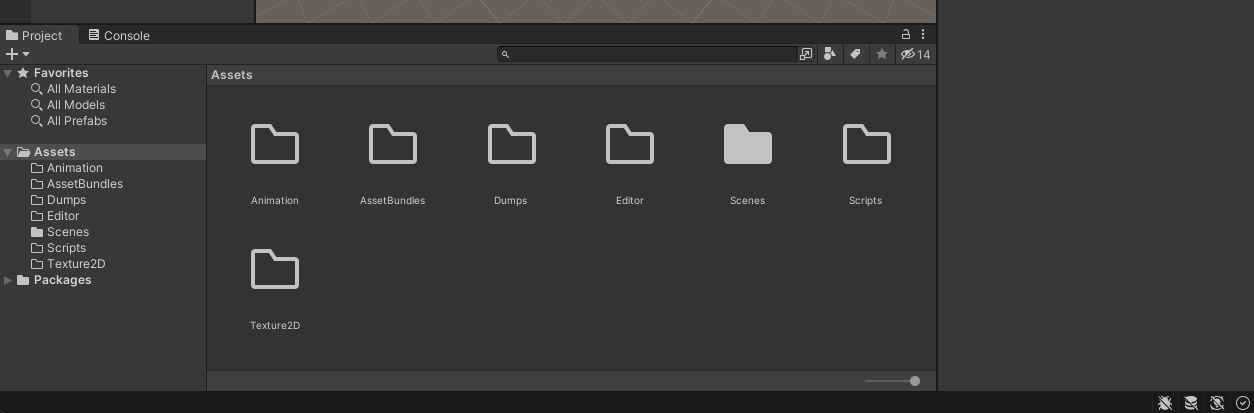
Inside ‘Dumps’, create ‘Game Dump’ and ‘My Dump’.
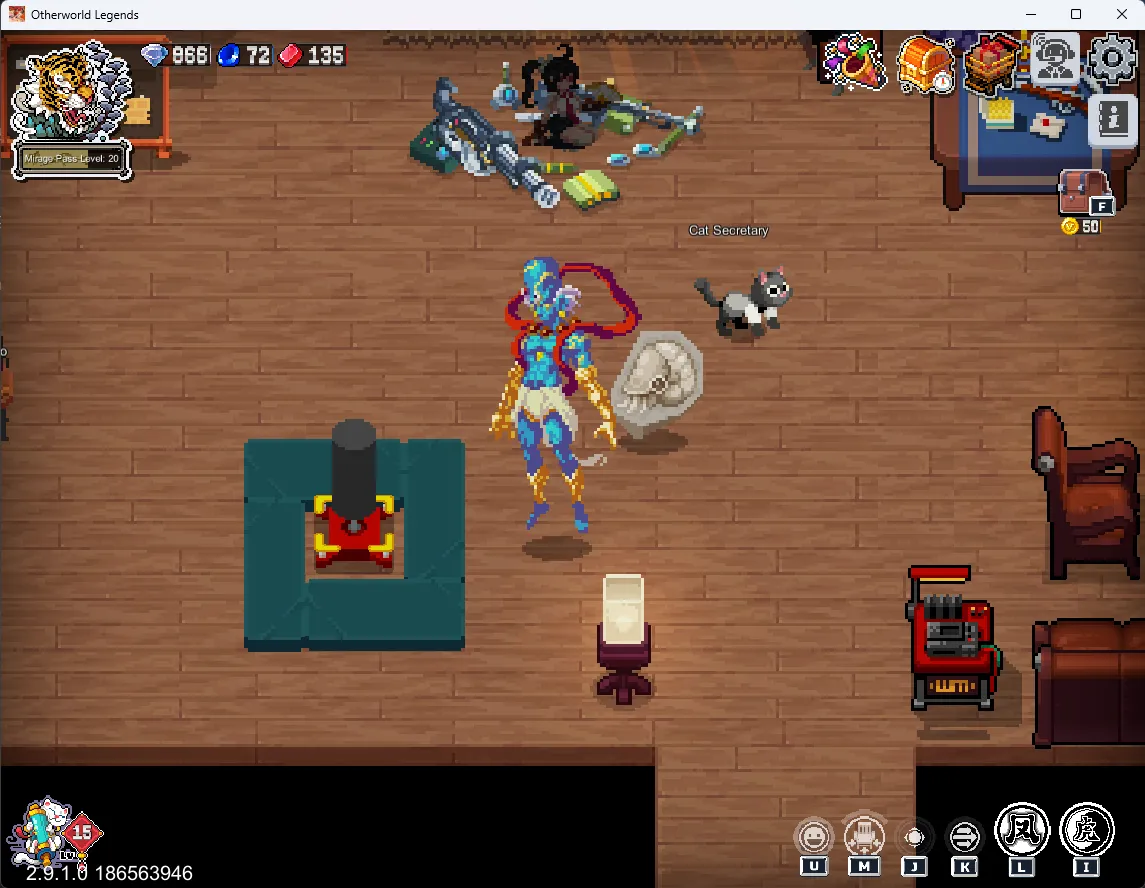
For the purpose of teaching, this tutorial will show you how to replace the idle state spritesheets of Quanhuying’s bartender skin to the idle state spritesheet of the Tianrendao boss. Please do bear in mind that you can definitely apply this technique with your own drawings. Using Tianrendao boss is only an example.
Their names in the spritereference folder are:
unit_asura_tianrendao.asset
unit_hero_quanhuying_bartender.asset
Use AssetStudio to extract their Texture2D files. Put them inside ‘Texture2D’ in Unity.
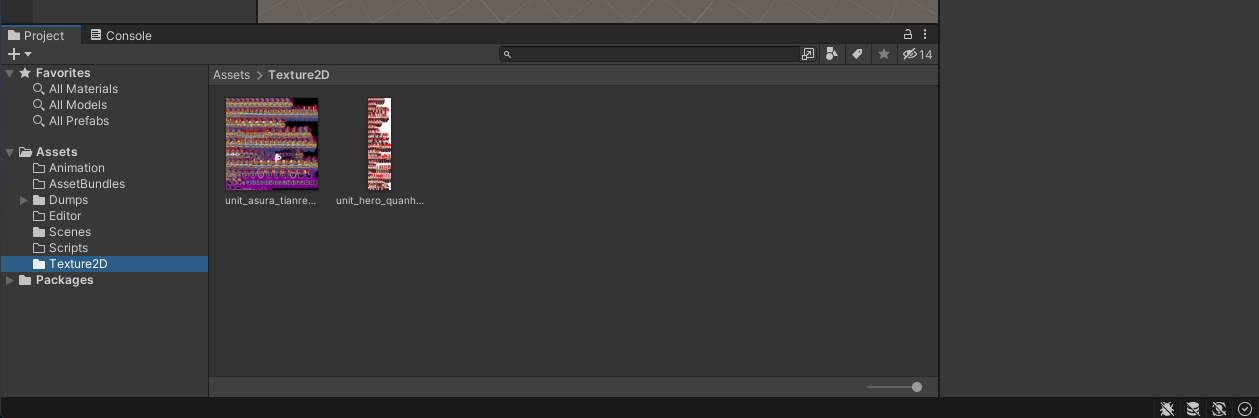
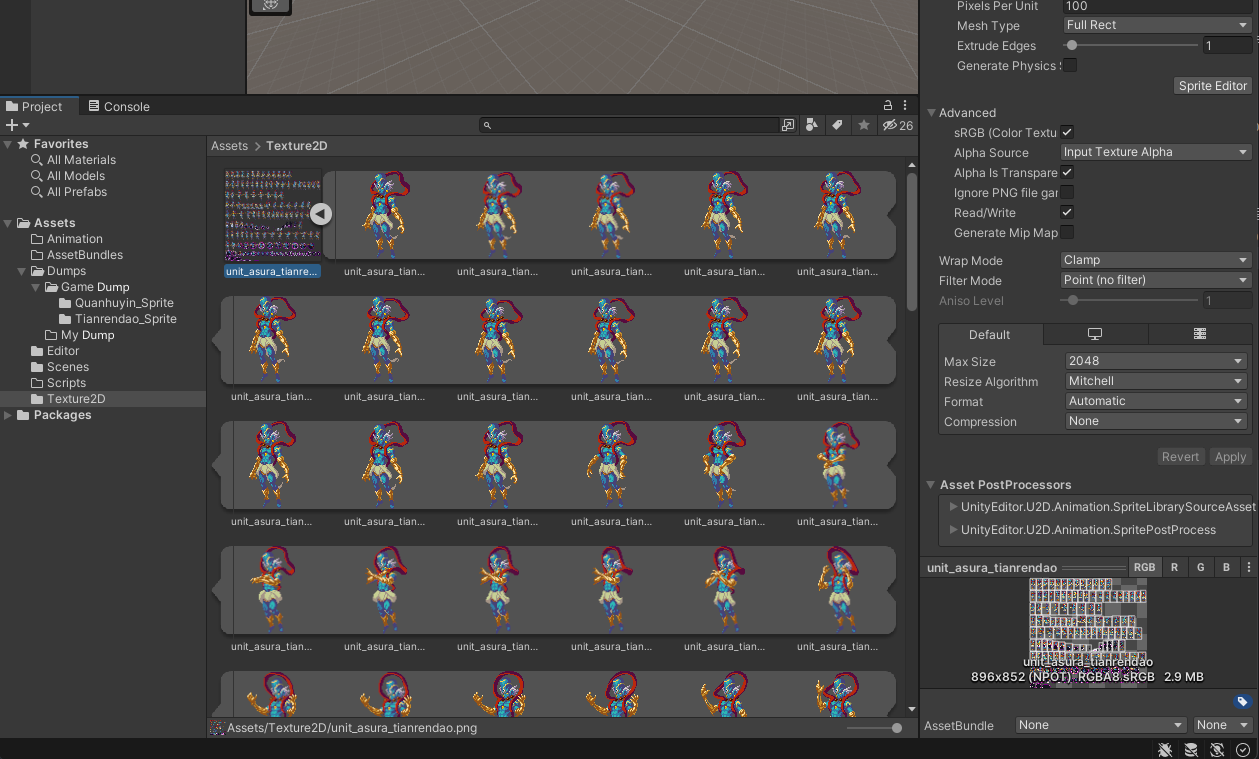
Next select those two files and make the following adjustments in the Inspector.
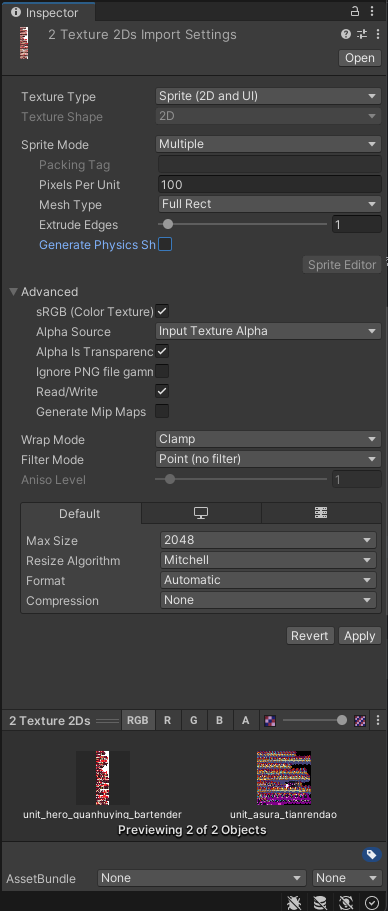
Make sure:
- Texture Type = Sprite (2D and UI)
- Sprite Mode = Multiple
- Mesh TYpe = Full Rect
- Uncheck Generate Physics Shape
- Check Read/Write
- Filter Mode = Point(no filter)
- Compression = None
- Apply
Next, use AssetStudio to extract all Dump files.
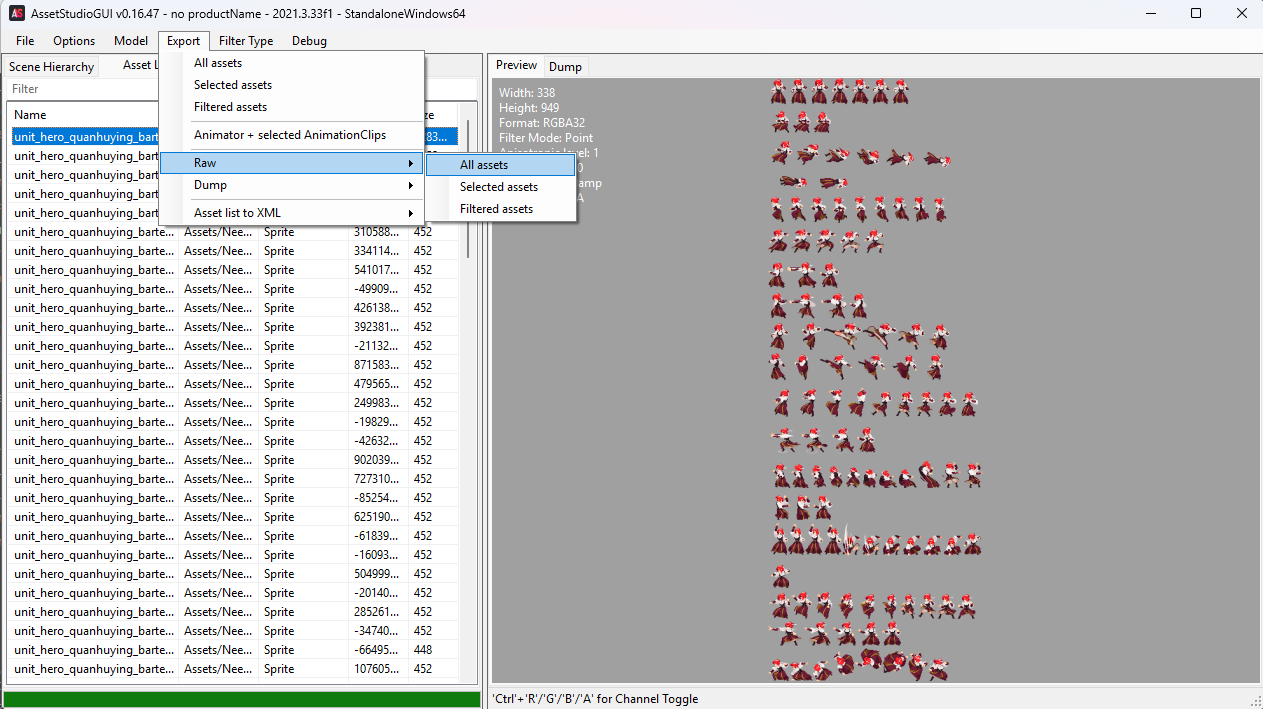
Here are the extracted contents. Our focus is on the Sprite folder.

Do that for both Quanhuying bartender and Tianrendao Sprite. You should get two Sprite folders. Here I have renamed them to ‘Quanhuyin_Sprite’ (spelling mistake) and ‘Tianrendao_Sprite’ and put them inside the Game Dump folder.
Step 3️⃣
Next, download Unity’s Sprite Editor. Open Package manager.
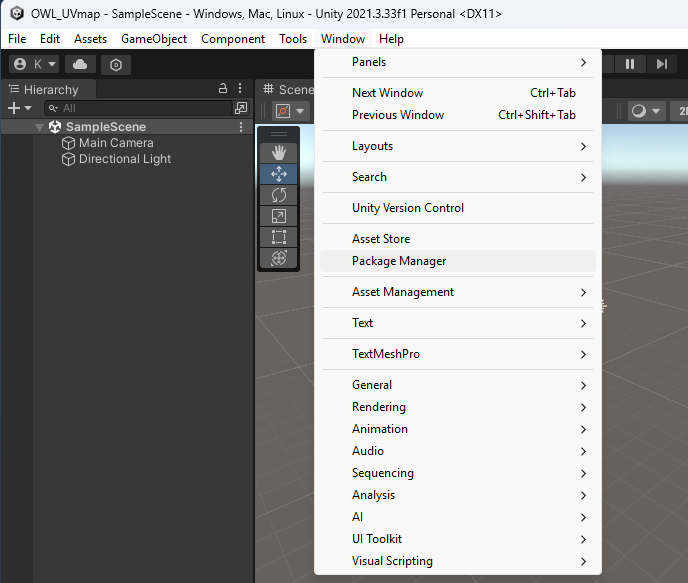
Make sure you set Packages to Unity Registry.
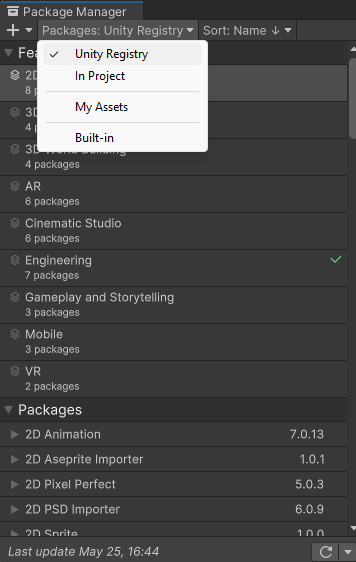
Find Features -> 2D -> 2D Sprite and download that.
![]()
Step 4️⃣
Next we will slice the Texture2D into multiple Sprites. Find the BatchSpriteDumpImporter.cs script from the ‘scripts’ folder in this tutorial repo。
Put the csharp script (manually verified AI code✅) inside the Editor folder in Unity and wait for Unity to execute the code.
![]()
You should see a new option in the Unity menu bar called Tools. Choose Batch Import Sprites From Dumps.

It will show you a popup window. Drag the Tianrendao boss Texture2D file’s icon into Target Texture, then drag Tianrendao_Sprite folder’s icon to Dump Folder. Click ‘Import All Dumps’.
![]()
You should now see a small triangular icon next to Texture2D. If you click that you can see all sliced Sprites.
 (You can check in the Sprite Editor as well.)
![]()
![]()
Apply this technique on Quanhuying’s bartender Texture2D as well.
Step 5️⃣
Next we will be editing the bartender skin (replacing the idle state to Tianrendao boss). Put the two Texture2D in any Pixel art editing software. (Here I will demonstrate using Aseprite).
It should look like this following (you will need to expand the canvas because Tianrendao boss is taller than Quanhuying)
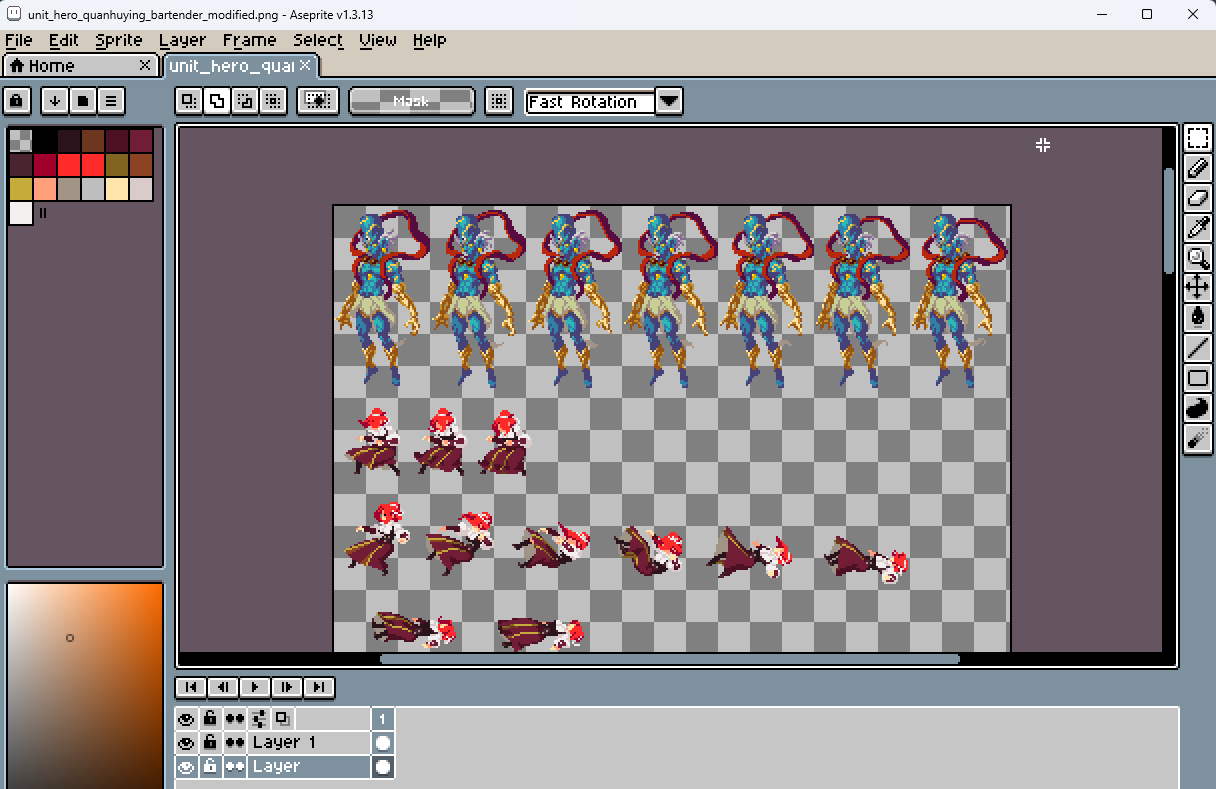
Save this image.
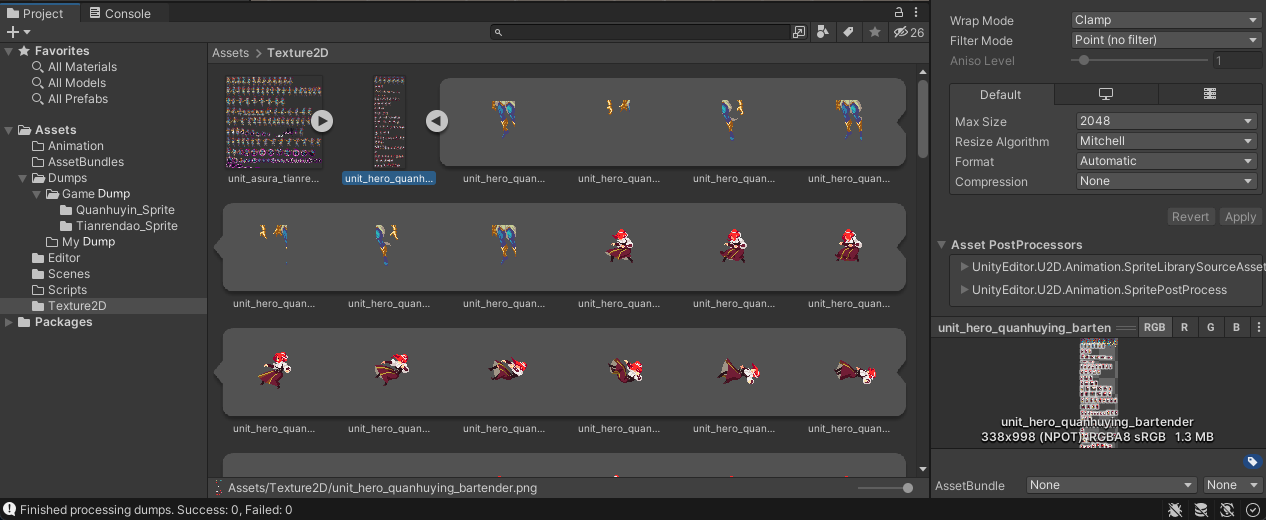
Back to Unity, if you click the small triangular icon next to bartender’s Texture2D. You should find the first 7 sprites changed. However, we still need more adjustments.
Now this next thing might be hard to understand. We will need to change the Sprtisheet setting for the edited Sprites. Essentially copying the settings from the original Tianrendao boss to the edited Sprites. ⚠️If you are doing your own drawings, you need to manually adjust the Spritesheet and test them so that they look right. I won’t be demonstrating how to do that here. Try search how to use Sprite Editor. After you are done, go to step 6.
Create a new folder inside ‘Game Dump’, call it ‘Temp_Sprite’. From ‘Tianrendao_Sprite’, copy the first seven dumps to there, and also copy from ‘Quanhuyin_Sprite’ (all of them except the first seven).
![]() (The red part is Tianrendao boss and the rest of them are Quanhuying)
(The red part is Tianrendao boss and the rest of them are Quanhuying)
Next, copy RenameTextAssets.cs (manually verified AI code✅) from ‘scripts’. After Unity executes it, you should find a new option called Rename TextAssets Window in Tools.
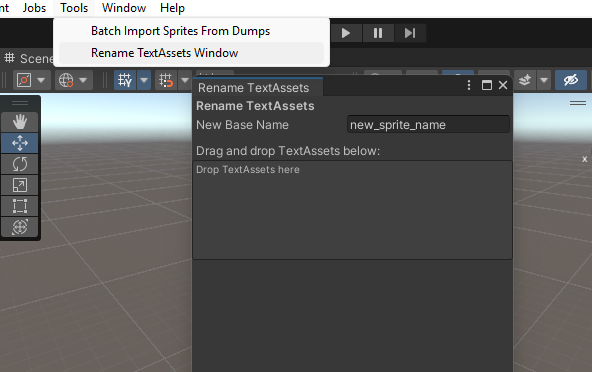
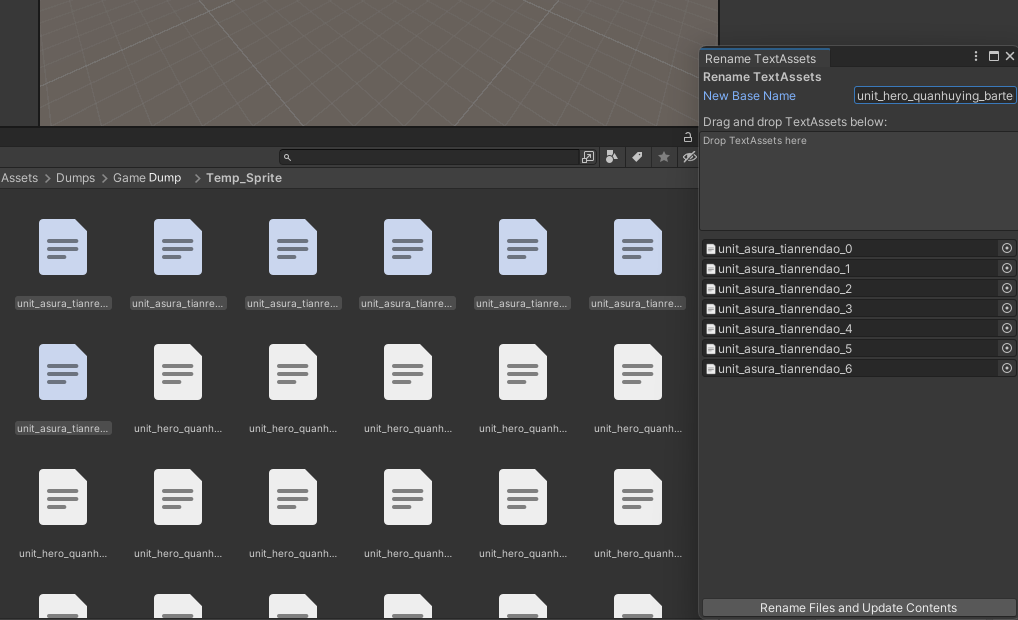
Next drag the first 7 dumps that belongs to Tianrendao boss to the popup window. Enter name ‘unit_hero_quanhuying_bartender’. Click ‘Rename Files and Update Contents’. By doing so we have renamed the files.
Using Batch Import Sprites From Dumps, choose Folder ‘Temp_Sprite’ and bartender Texture2D.
![]()
Open bartender’s Sprite Editor.
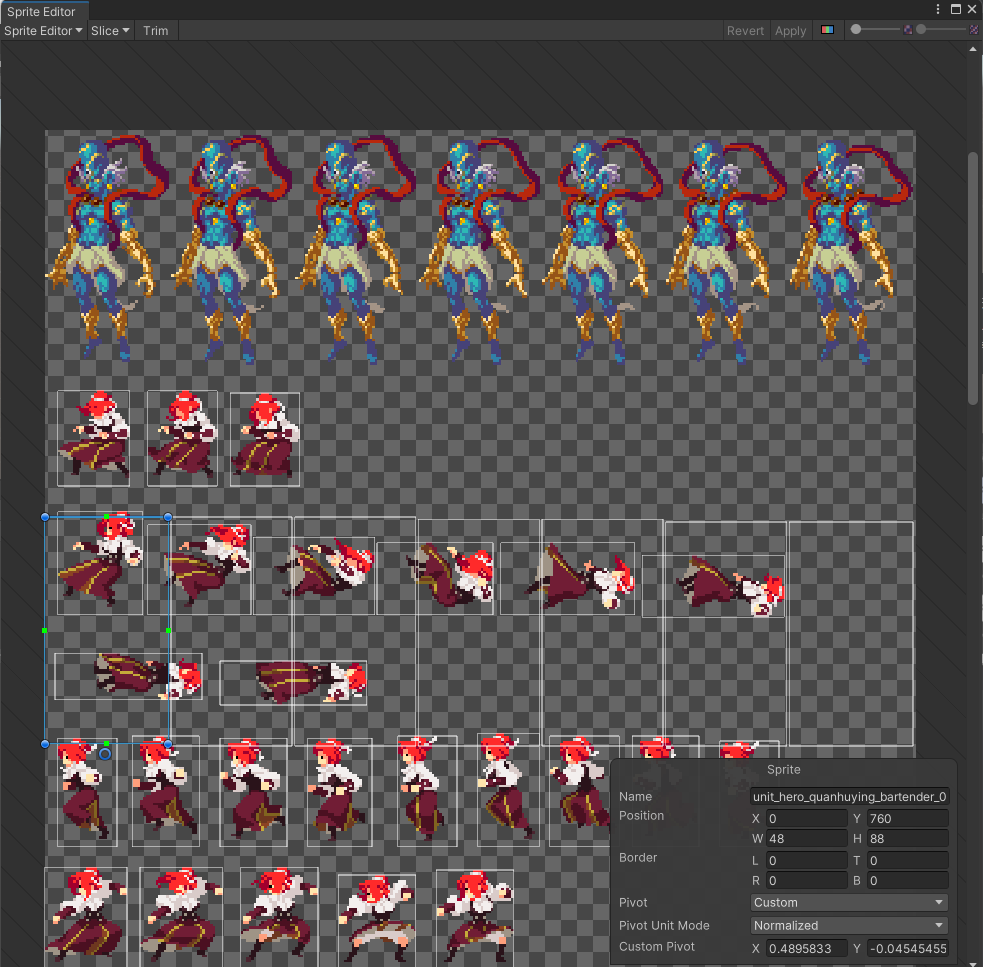
Align the Spritesheet for Tianrendao and apply.
![]()
Check bartender again.
![]()
Step 6️⃣
In this step we will learn how to make bundles. Select bartender Texture2D and find this option.
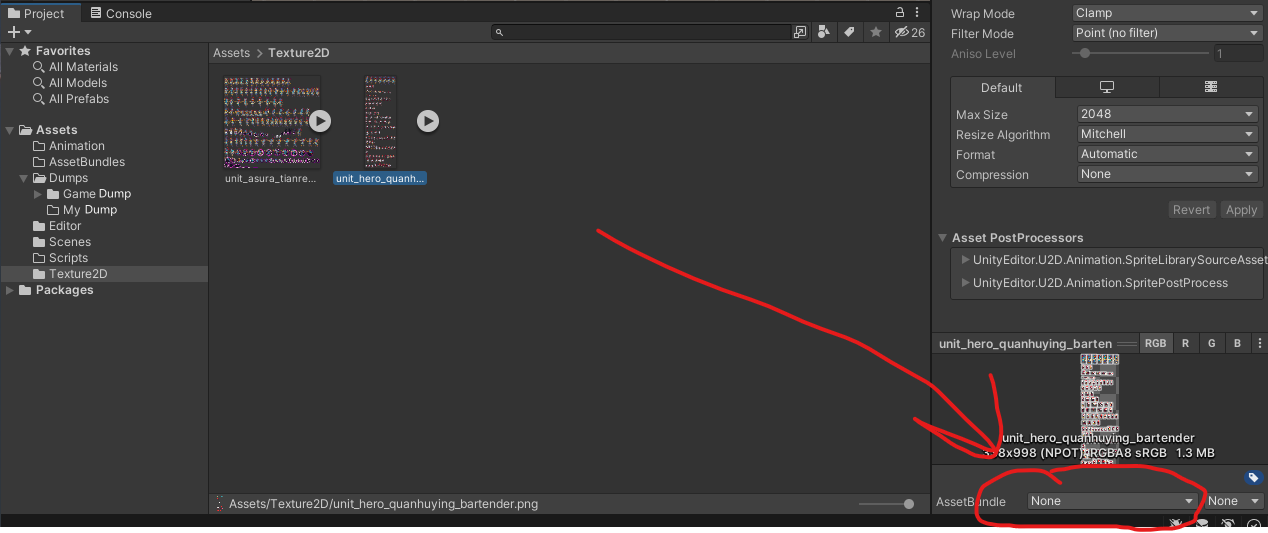
Choose ‘New…’, enter ‘unit_hero_quanhuying_bartender’.

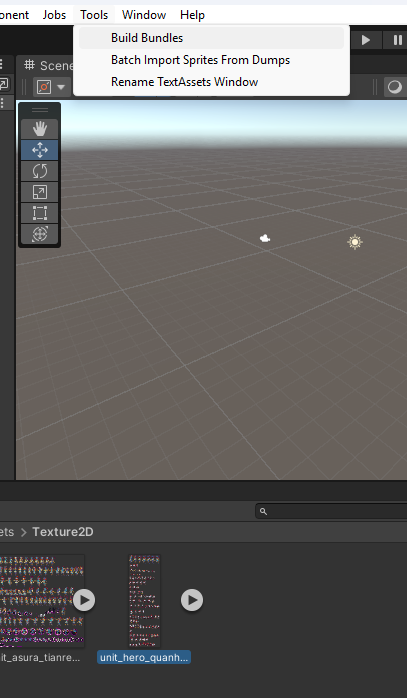
Find AssetBundleBuilder.cs in scripts folder and put that in Unity Editor. After Unity executes it, you should see a new option call Build Bundles. Now select bartender Texture2D and click that option.
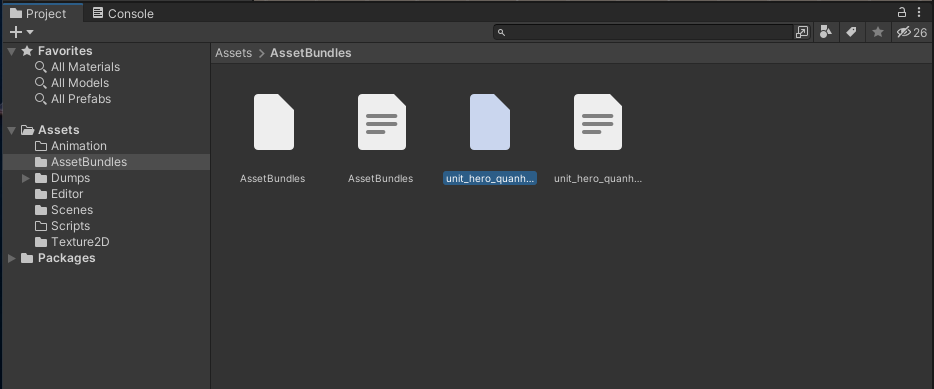
After it finishes, you will see a few new files inside ‘AssetBundles’. There is a file called ‘unit_hero_quanhuying_bartender’ we can open with UABEA.
Step 7️⃣
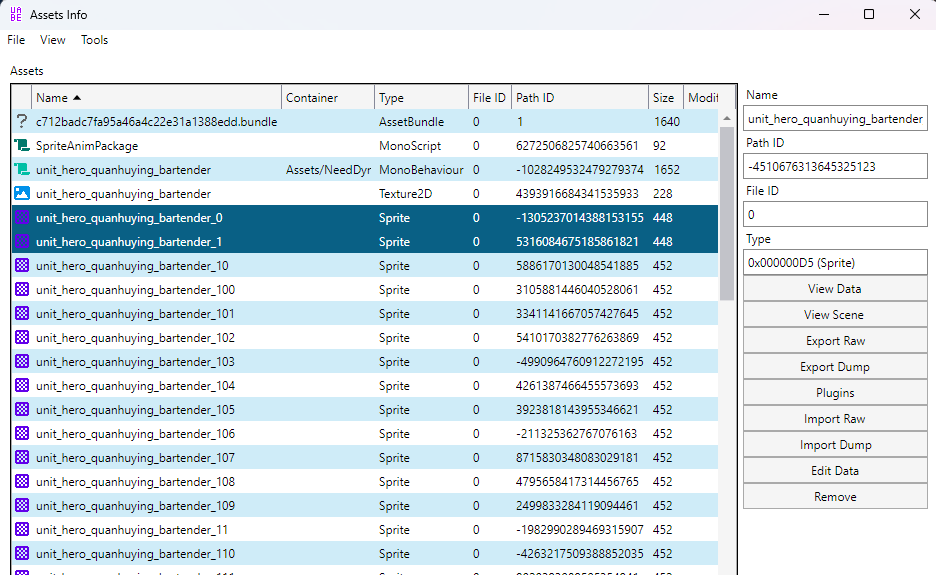
Open ‘unit_hero_quanhuying_bartender’ inside UABEA. Choose Memory -> Info. Sort them by name.
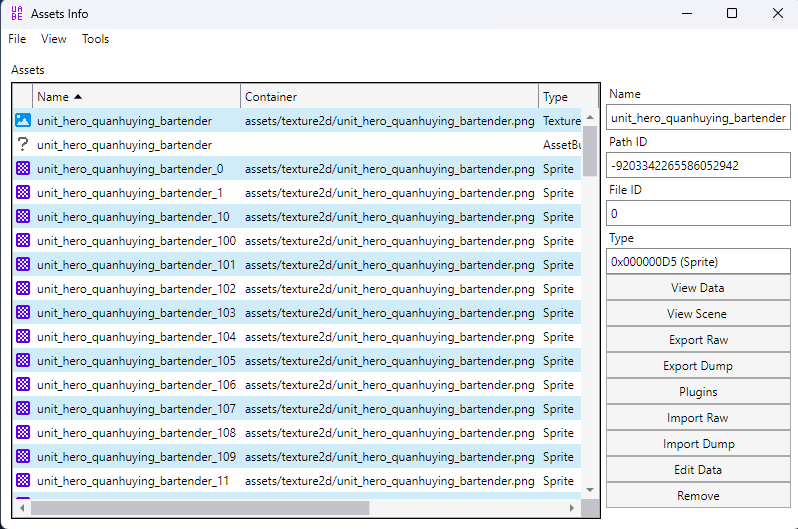
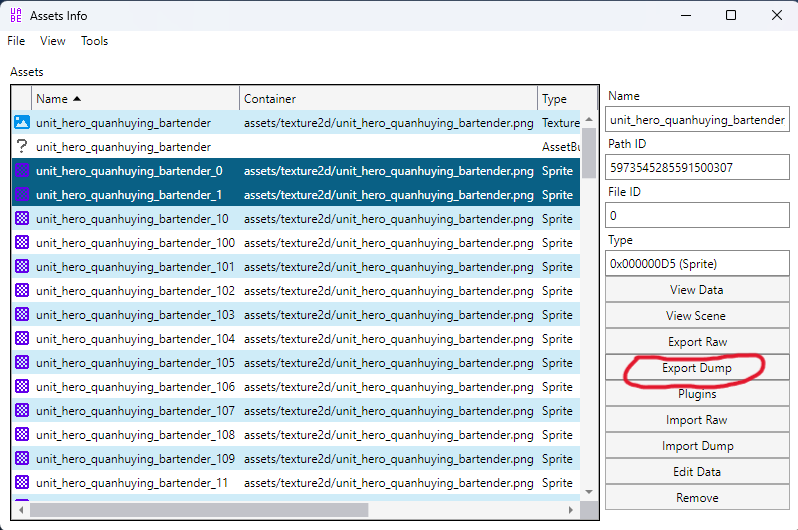
Select the following files.
- unit_hero_quanhuying_bartender_0
- unit_hero_quanhuying_bartender_1
- unit_hero_quanhuying_bartender_2
- unit_hero_quanhuying_bartender_3
- unit_hero_quanhuying_bartender_4
- unit_hero_quanhuying_bartender_5
- unit_hero_quanhuying_bartender_6
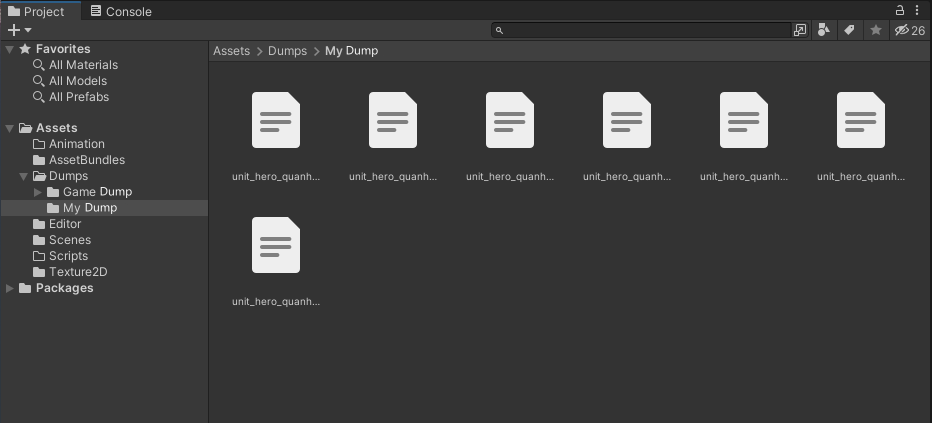
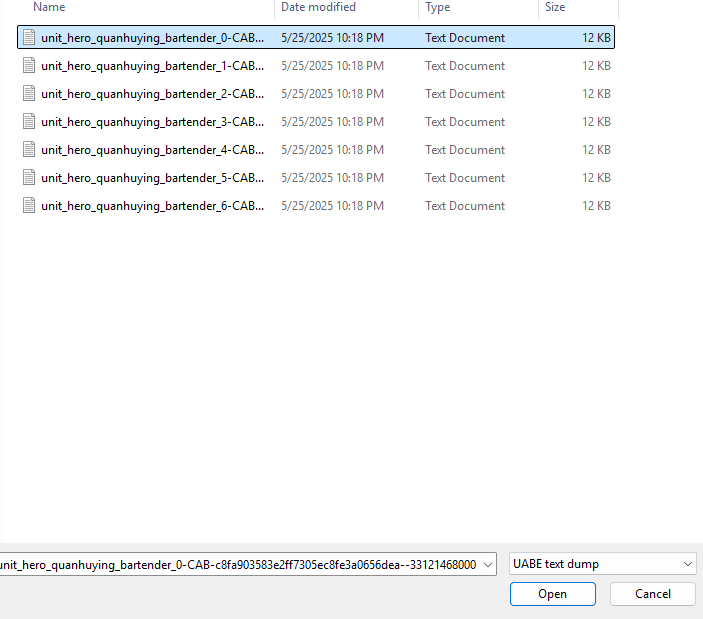
After you did that, click ‘Export Dump’, put them inside Unity ‘Dumps/My Dump’. Save as UABE text temp.
Check your ‘My Dump’.
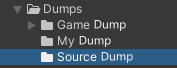
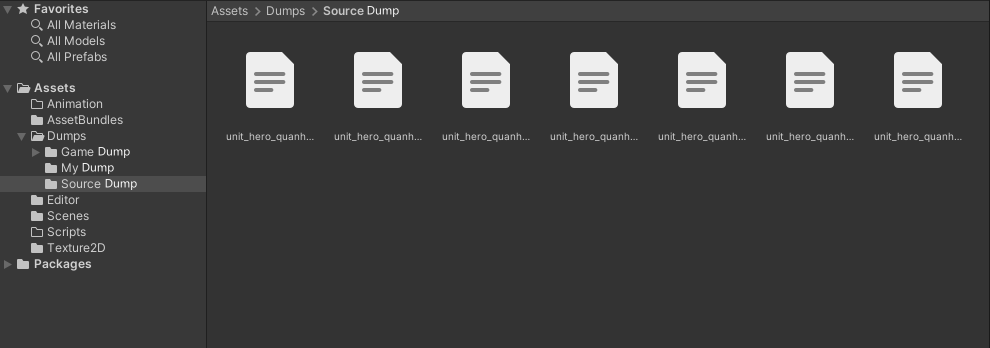
Create a new folder called ‘Source Dump’ inside ‘Dumps’.
Open a new UABEA window, and from there open ‘spritereference/unit_hero_quanhuyingbartender’ file. Choose an arbitrary unit_hero_quanhuying_bartender file and Export Dump into the Source Dump.
Check your ‘Source Dump’.
Find ReplacePathID38.cs (manually verified AI code✅) and put that in Unity Editor folder. After Unity executes that you should see a new option called ‘Replace Line 38 From Folder’. Match ‘Source Dump’ and ‘My Dump’ and click ‘Replace Line 38’.
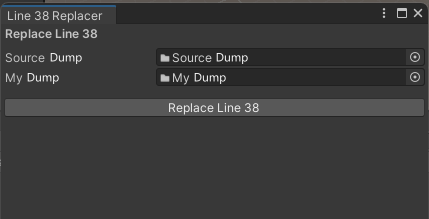
(FYI: Line 38 in a TextAsset is the PathID of texture. We do this to change our bundle’s PathID to the source bundle’s PathID.)
⚠️ After the replacement is complete. Delete all files inside ‘Source Dump’ to avoid bugs next time you make mod.
Step 8️⃣
Open a new UABEA window, and from there open ‘spritereference/unit_hero_quanhuyingbartender’ file. Replace the Texture2D file. Plugins -> Edit Texture -> Ok -> Load. Select the edited Texture2D in Unity project. Save process is the exact same as before.
Next open ‘spritereference/unit_hero_quanhuyingbartender’ file again. This time we want to replace Sprtes.
Select unit_hero_quanhuying_bartender_0. Click ‘Import Dump’. Find the corresponding file in ‘My Dump’.
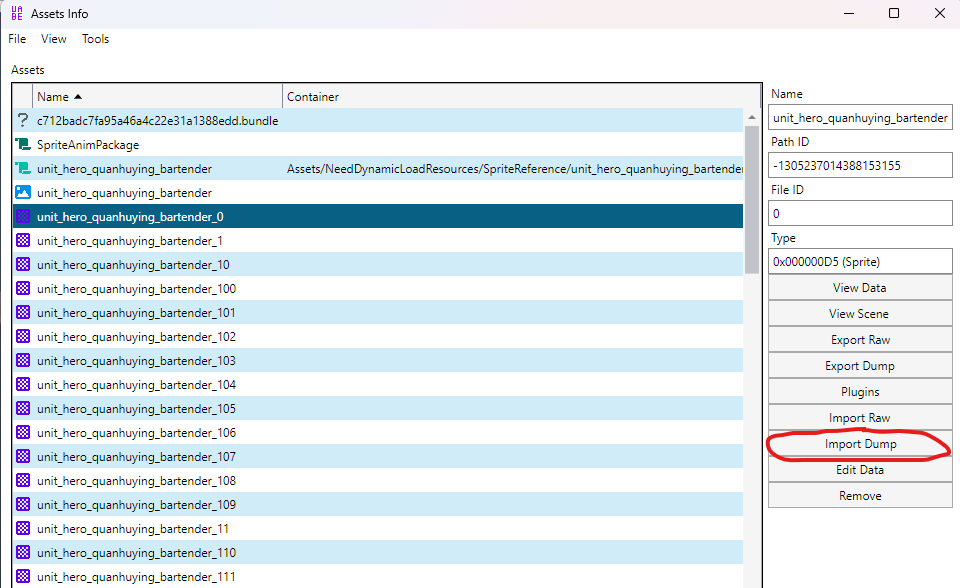
Do the same with 1, 2, 3, 4, 5, 6, then apply the exact same save process.
After that, run the addrtool. Test it in the game.
💗 If you liked this blog, consider following me on GitHub.
👾 Happy Gaming 👾